Squarespace is a popular website builder used to create 44% of the top 1 million traffic sites, which is no wonder as it offers a wide selection of templates and creative tools that make creating a website easy even if it’s your first time around.
In this Squarespace guide, we’ll show you how to use Squarespace to win over your customers.
What is Squarespace
What is Squarespace used for? Squarespace is a website builder created to help anyone build a website without coding. Just invest a few hours, and you’ll have anything from a basic website to more advanced versions like an online store. Take, for example, Keanu Reeves’ business’ website built with Squarespace, the design is stunning, and it helps the business stand out.
Who is Squarespace for? Squarespace makes it easy to build a website, even if you’ve never done it before. It offers plenty of templates that rely on high-resolution images, making Squarespace a solution for designers, online stores, and small business owners who need to create a visually stunning website in a short time without spending their whole budget on a designer.
Can you get value for money? Squarespace offers a wide range of pricing plans:
- Personal – $12 per month billed annually
- Business – $18 per month billed annually
- Basic Commerce – $26 per month billed annually
- Advanced Commerce – $40 per month billed annually
All the plans come with features that take care of the site maintenance:
- unlimited storage and bandwidth options
- a custom free domain
- 24/7 customer support
- additional SEO features
- SSL security built into your back-end.
Higher tiers will bring your perks like tools for blogging, e-commerce features, code injection, promotional pop-ups, and email marketing. If you want an online store, the cheapest package is the $18 per month Business plan ($26 paid monthly), which comes with unlimited products, unlimited gift cards, and donations.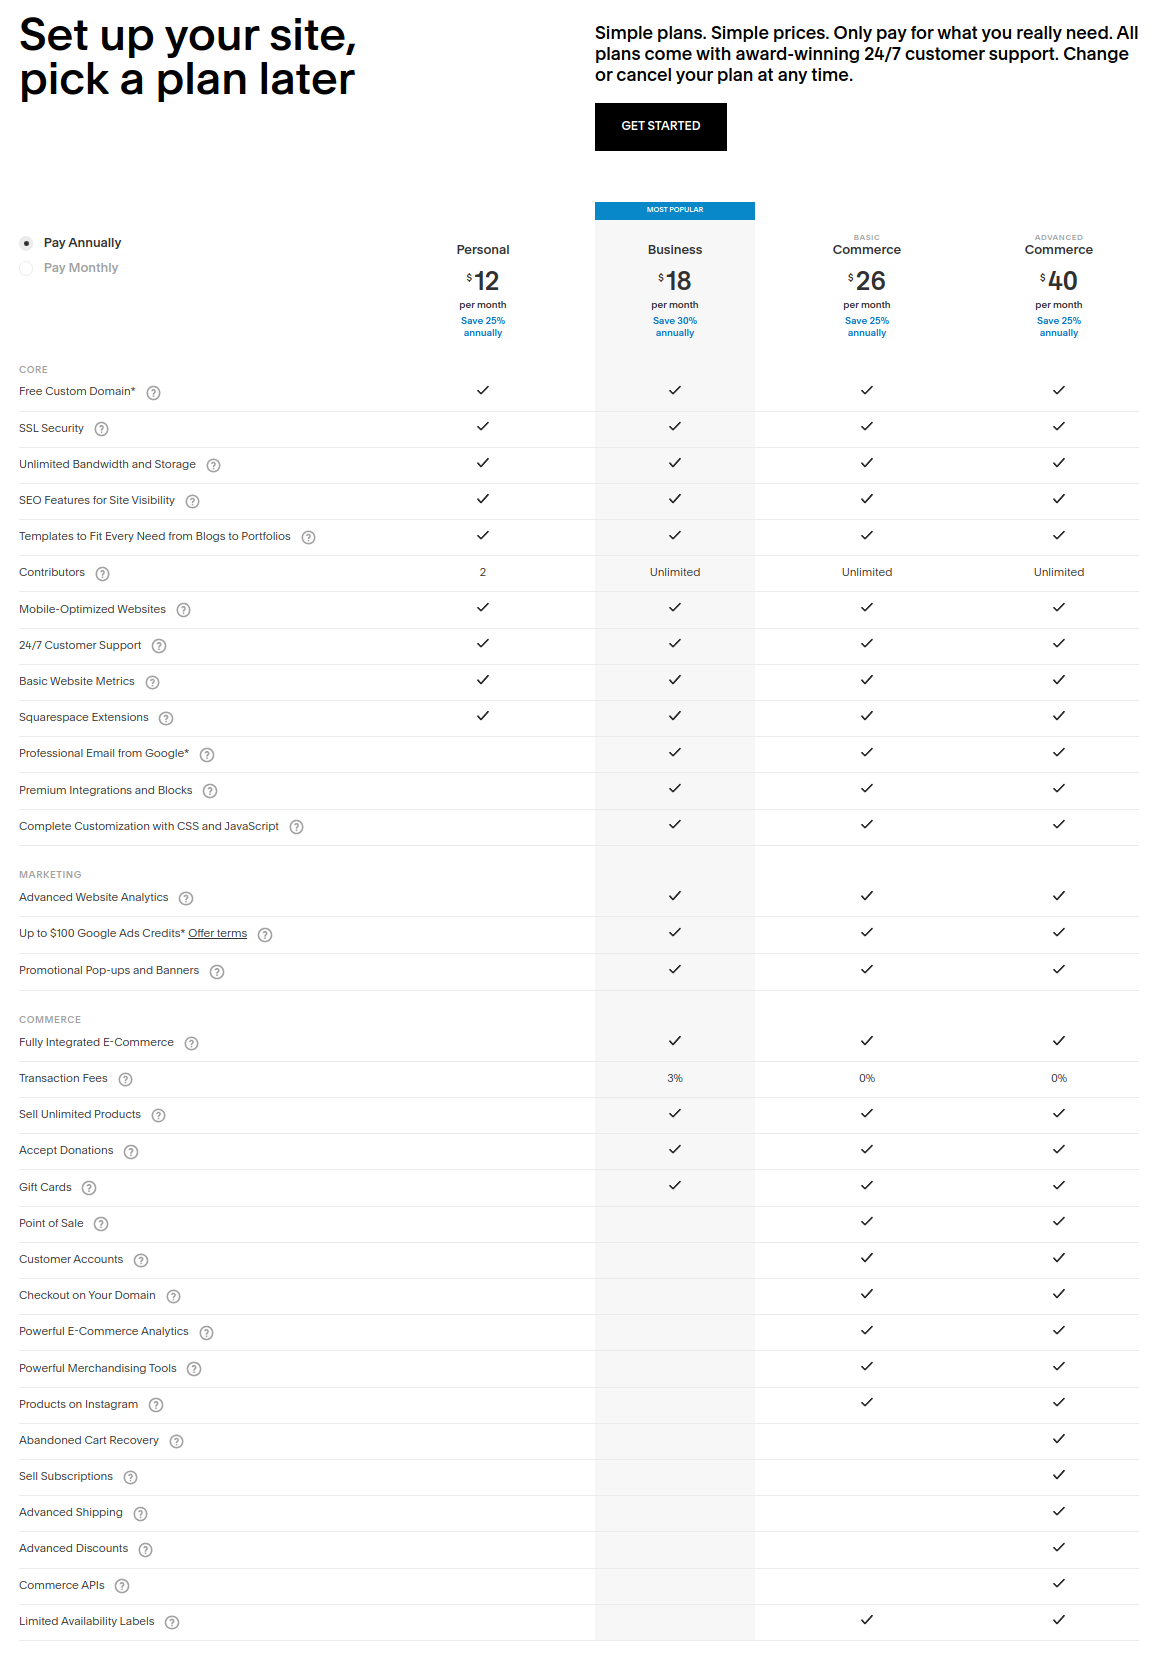
Squarespace Pros and Cons
Pros
Beautiful templates: there are 100+ templates to choose from, so you can build a professional-looking website with minimum edits.
Suitable for beginners: It has a shorter learning curve, allowing editing directly on the page. You can also use sleek templates with a full array of customization options. You can add pre-built sections that help you set up the website really fast.
You have everything in one place: It has all the solutions built into the builder so that you won’t face any compatibility issues. For example, adding a plugin on WordPress can lead to downtime if the author has decided to stop updating it. Squarespace takes care of all updates, and all your solutions are compatible with each other.
Blogging tools: You can create drafts, see all your posts, edit content on the page, write posts on the go with an app, collaborate with your team by setting the drafts for review, and schedule your posts. You can even stream a podcast to accompany your articles. If your podcast gets popular, you’ll get an extra promotion by Squarespace.
Tools created for online stores: Add elements like inventory, cart, set up a storefront in a few clicks. Squarespace makes it easy to set up a dynamic online store.
Unlimited storage: Squarespace lets you add high-resolution photos and videos to your website without extra fees. Some website builders, like Wix, require upgrading your plan to increase storage capacity.
Built-in marketing tools: Squarespace enables you to create eye-catching emails without having to use a third-party app. That’s one less app to sign up and pay for.
24/7 chat: Feeling stuck while editing the template? Support will help you solve any problem you can experience while building your website.
Squarespace lets you edit content easily: you can edit content directly on the page. Just click and start editing.
Cons
Less flexibility with your domain: Squarespace covers everything necessary for your website. However, it means that if you decide to switch providers, you won’t be able to migrate to another provider. If you’d rather have complete control over your website, WordPress is a better choice because it gives you the means to create a self-hosted website.
Might not be the right choice for a complex website: There’s only one sublevel for your site’s pages available, so it might not be enough for really big and complex sites.
Not suitable for small images: Most templates use high-resolution images, so your website won’t look great anymore if you replace them with a smaller image.
Choose Squarespace if you don’t have a team member to maintain the website, and you want access to fast support if something goes wrong.
How to build a Squarespace website
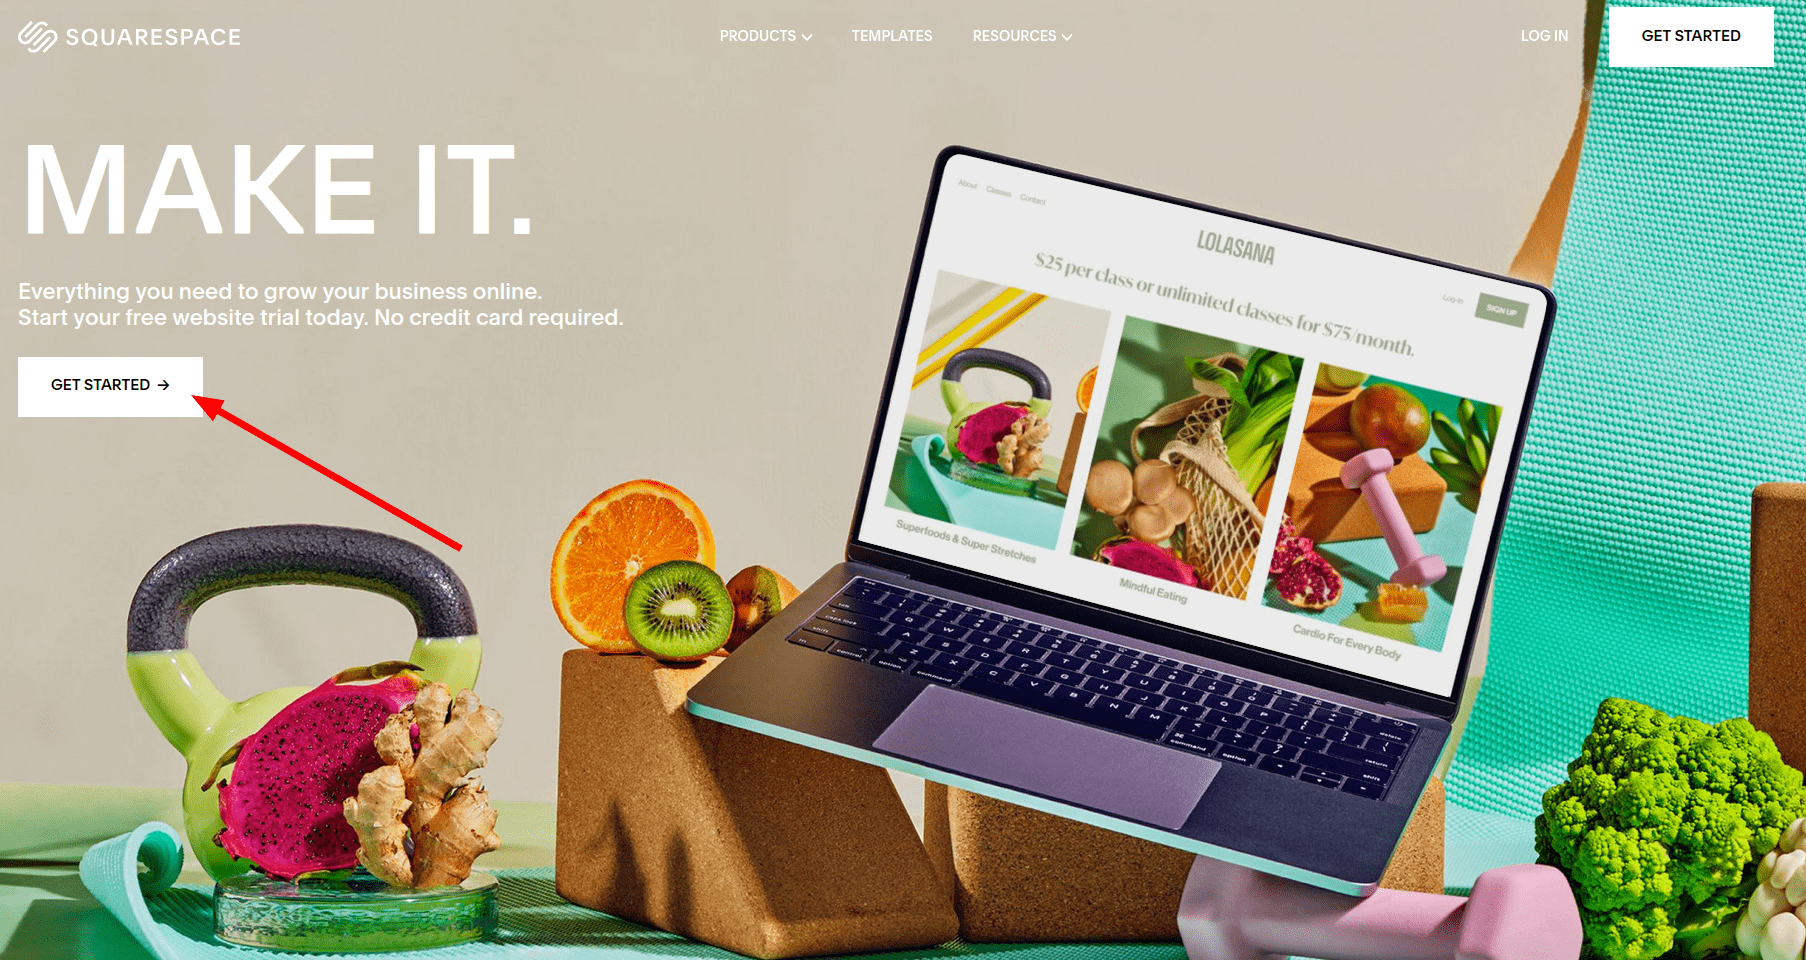
We’ll show you the tips to learn how to build a stylish website quickly and easily. You need to create an account, choose a template, and start editing to match your needs to get started.
Start on the Squarespace.com website.
 You will go straight to the design screen.
Choose a template you like.
You can choose any template. All templates are included in a membership fee and organized into type and niche. You can start with looking through popular designs; usually, there was a reason why they became popular, so you can’t go wrong there.
If you’re building an online store, you’d better stick to the Online store category, as they are optimized for online stores and have all the necessary features from the box.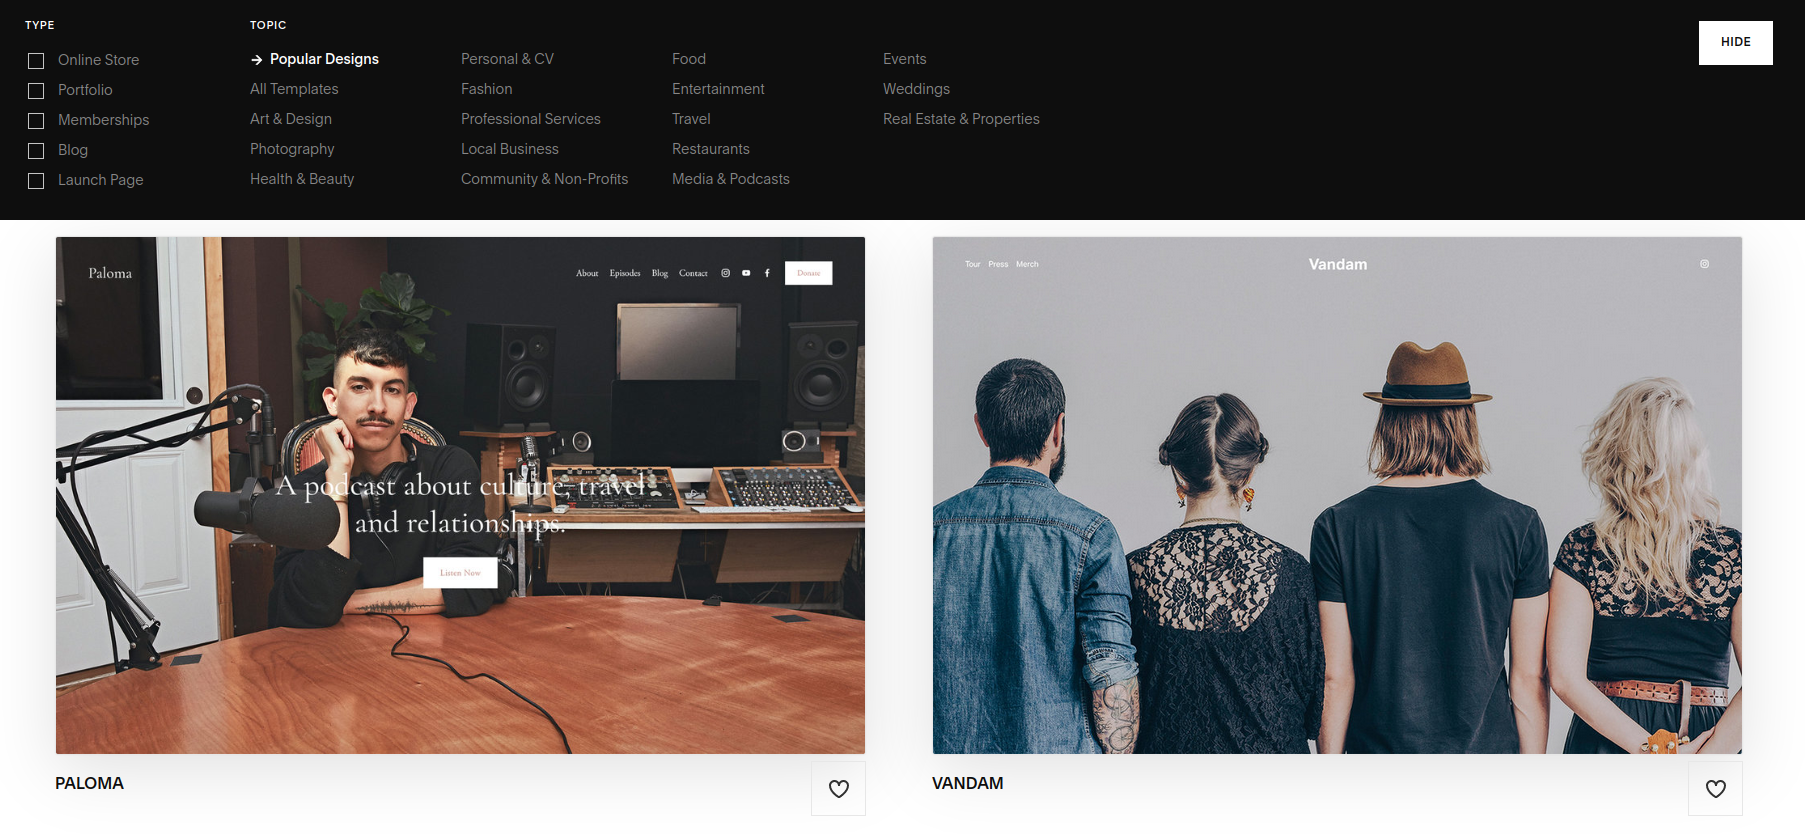
Before you choose a template for your website, you can preview it to make sure it’s what you need. To check the template out, hover over the template to see the preview link. Make sure to preview a few templates because you won’t be able to switch the template later. For example, you can look at your mood board with the websites you like and find one that matches the aesthetics.
Don’t just pick a template because it matches your niche. Chances are, if you sell dresses and choose a template for fashion, all your competitors will do the same. So go for the look, not just the niche, as you’ll be able to add necessary pages later in a few clicks, but customizing the looks takes longer.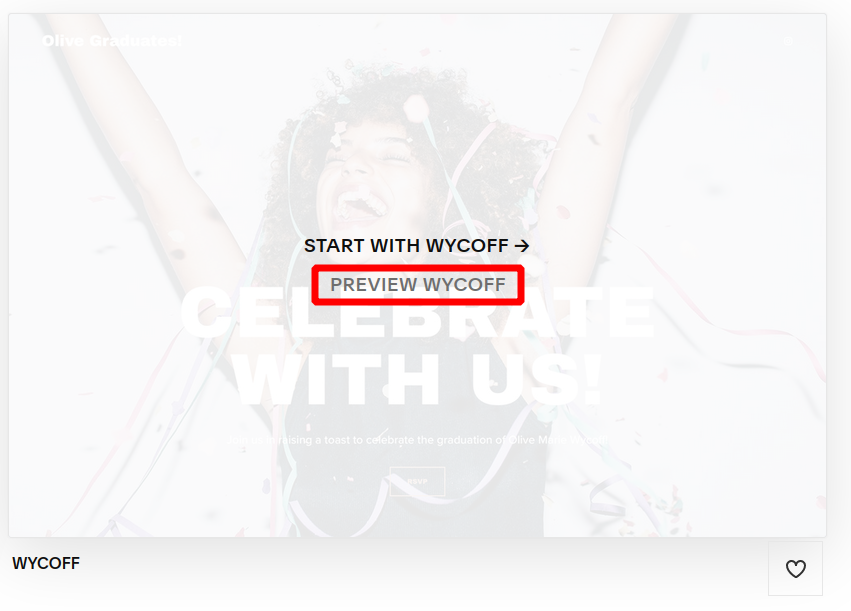
Once you’ve found the template you like, click Start with design to add it to your site. At this point, Squarespace will ask you to create an account or log in. Create an account with email, Apple, or Facebook. You’ll be able to create an account for free and enjoy a 14-day trial, giving you plenty of time to decide whether Squarespace is the right fit for you.
Start your website.
Squarespace will lead you through the whole process. Add the name of the website now, or revisit this step later. You can also choose to look at or skip the screens with tips.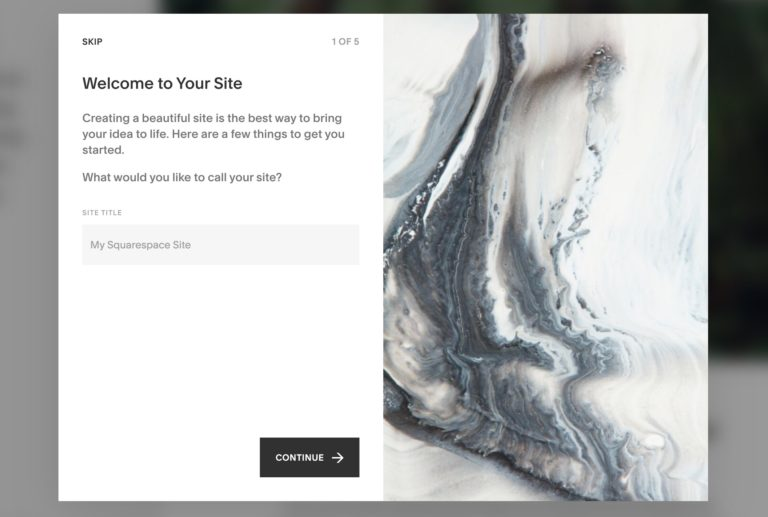
Once you do that, Squarespace will show you how to handle customization, like adding pages or changing the design.
Get familiar with the dashboard.
The Preview section takes the biggest part of your screen. It starts on your site’s homepage. You can navigate to other pages just as you would on a website.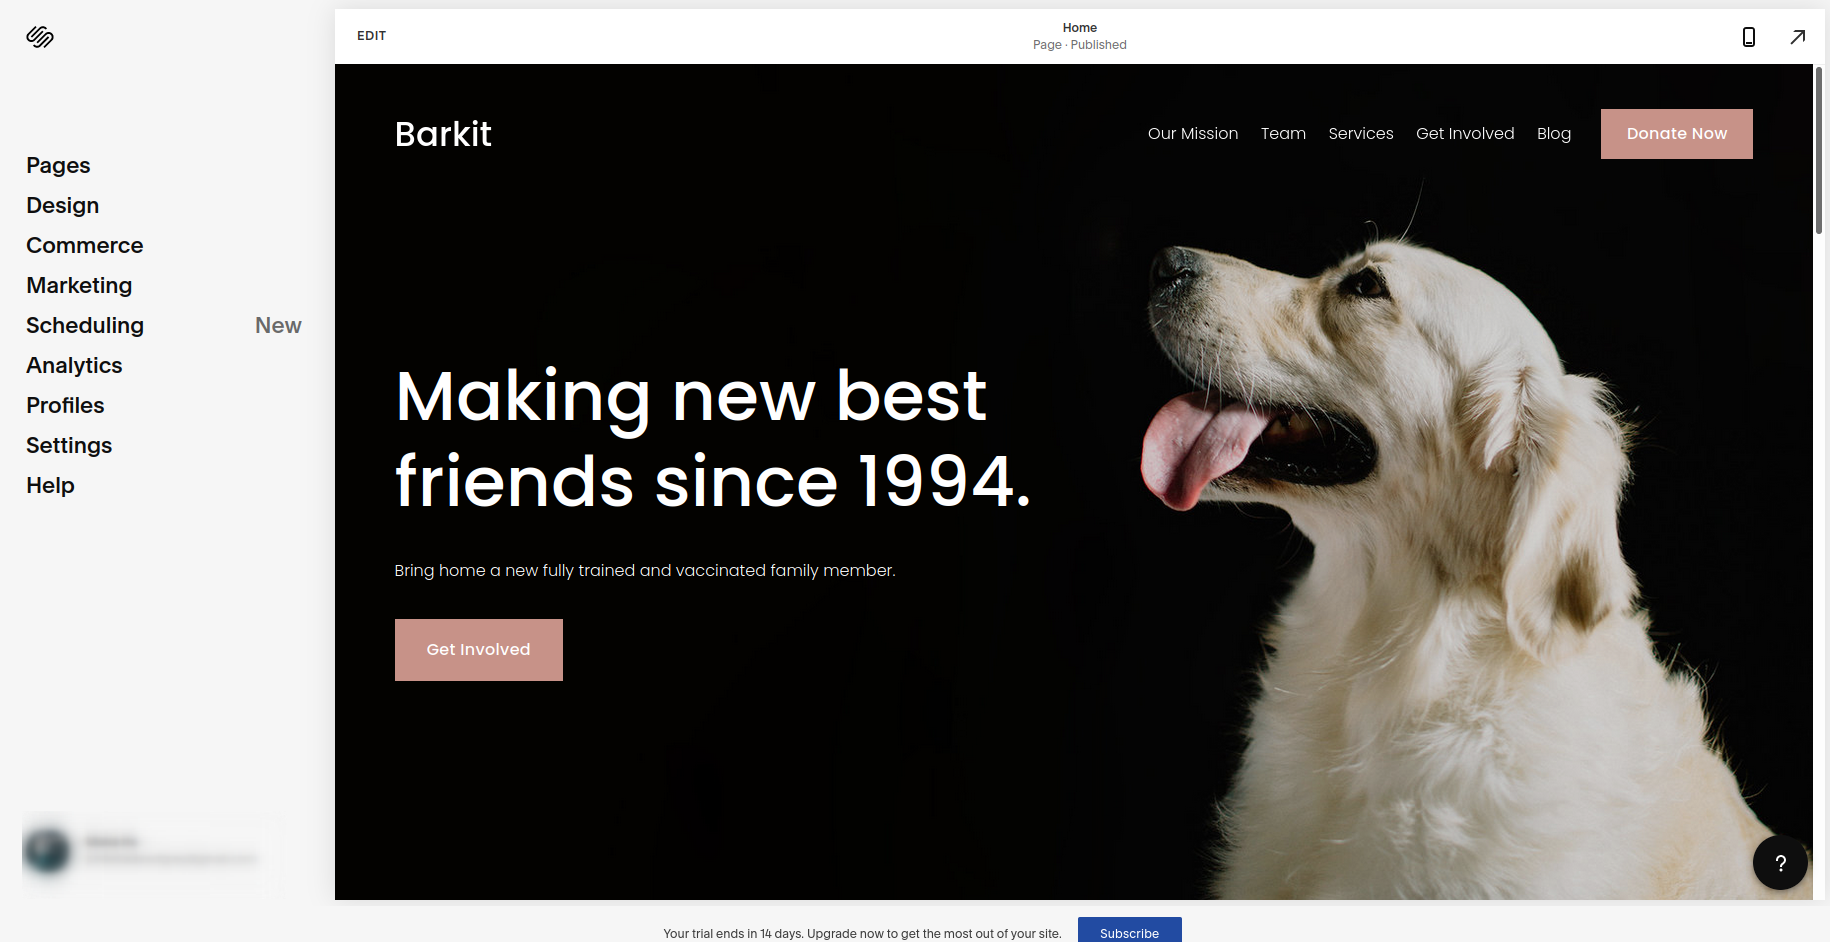
Clicking on Edit in the top-left switches preview to editing mode and lets you change content, text, and images.
The menu on the left takes care of the website-wide changes: you can add or delete pages there, fine-tune the design and use additional features like analytics or managing your online store or blog.
Keep in mind that there’s no autosave, so when you’re done, hover over the Done button to save your changes. There’s also no undo button per se. You can hover over the Done button and choose to discard changes but not undo a specific edit. 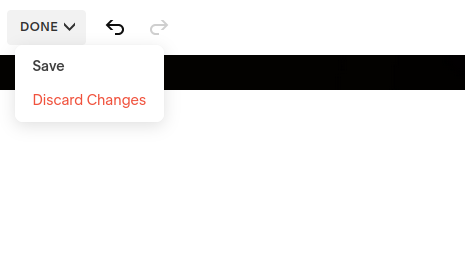 However, you can undo text editing by using the standard combination of CTRL+Z. So, it might be a good idea to save the edits regularly.
Edit the header.
You can add the logo, your website’s name and change the elements of your navigation. To add your logo, edit the header of the website. Changing the header will alter how it’s displayed on every other page of your website.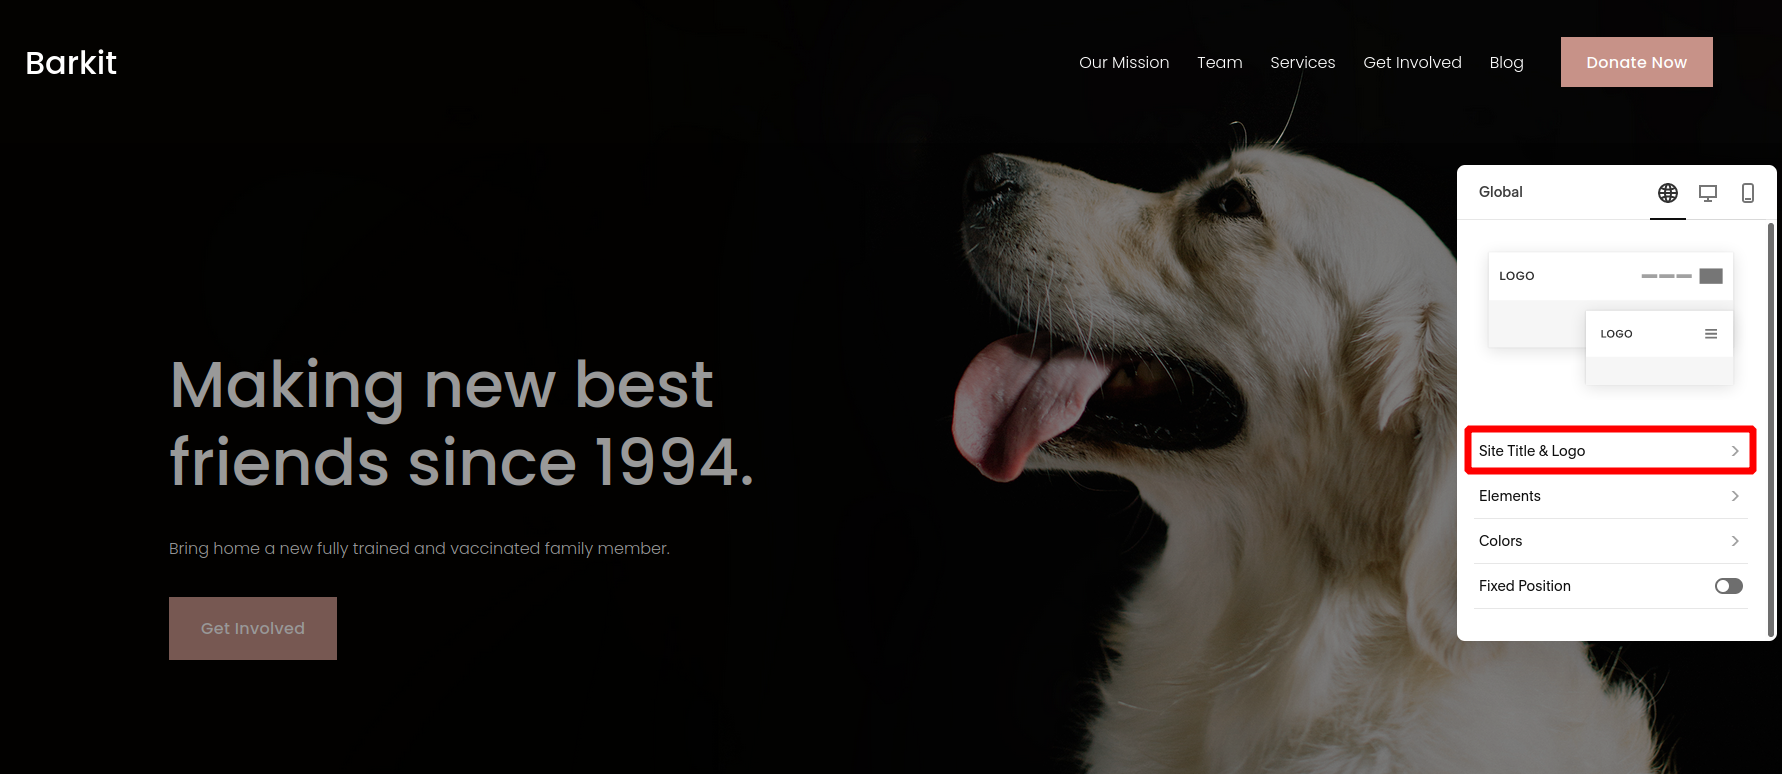
The logo will replace the site title. If you don’t have a logo, you can use a separate Squarespace logo maker. It offers basic editing and icons you can use. 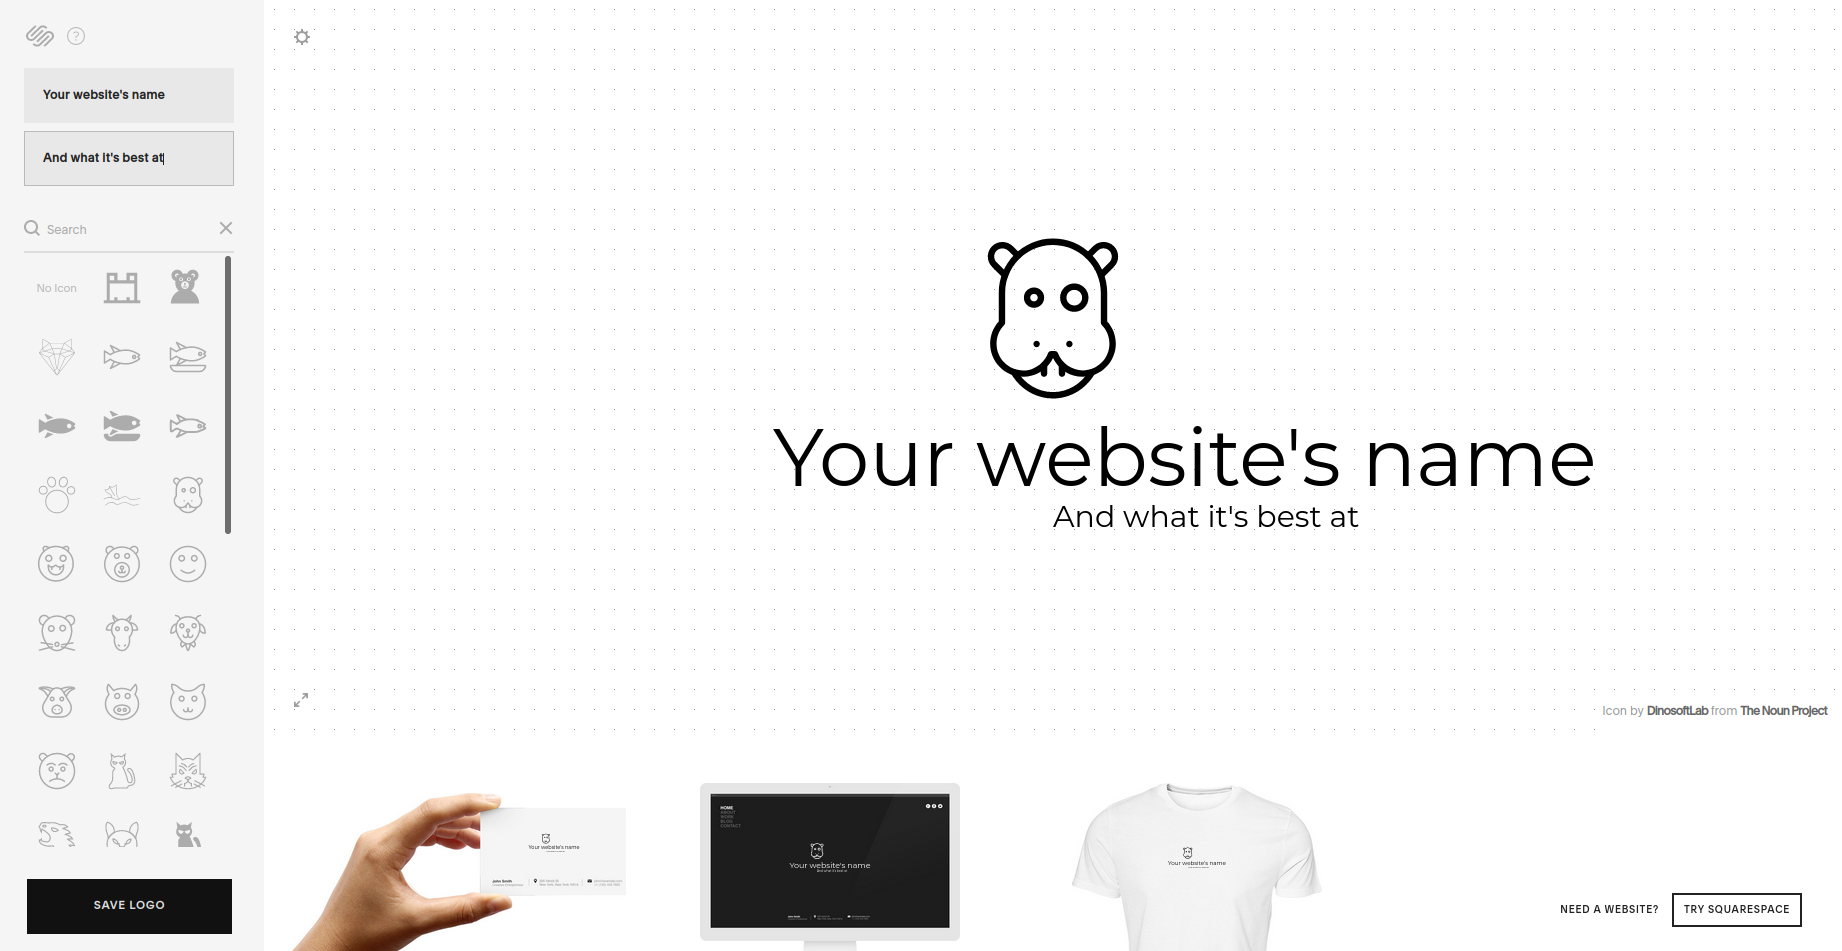
In the Elements tab, you can add elements to your header, like social media, by switching the toggles on and off. You can remove any irrelevant links and add the links you need. 
When you update the header, your footer will be automatically updated with the social media links, so you won’t need to worry about that.
Do the basic customization.
Customize fonts and colors if needed in the Site Styles menu.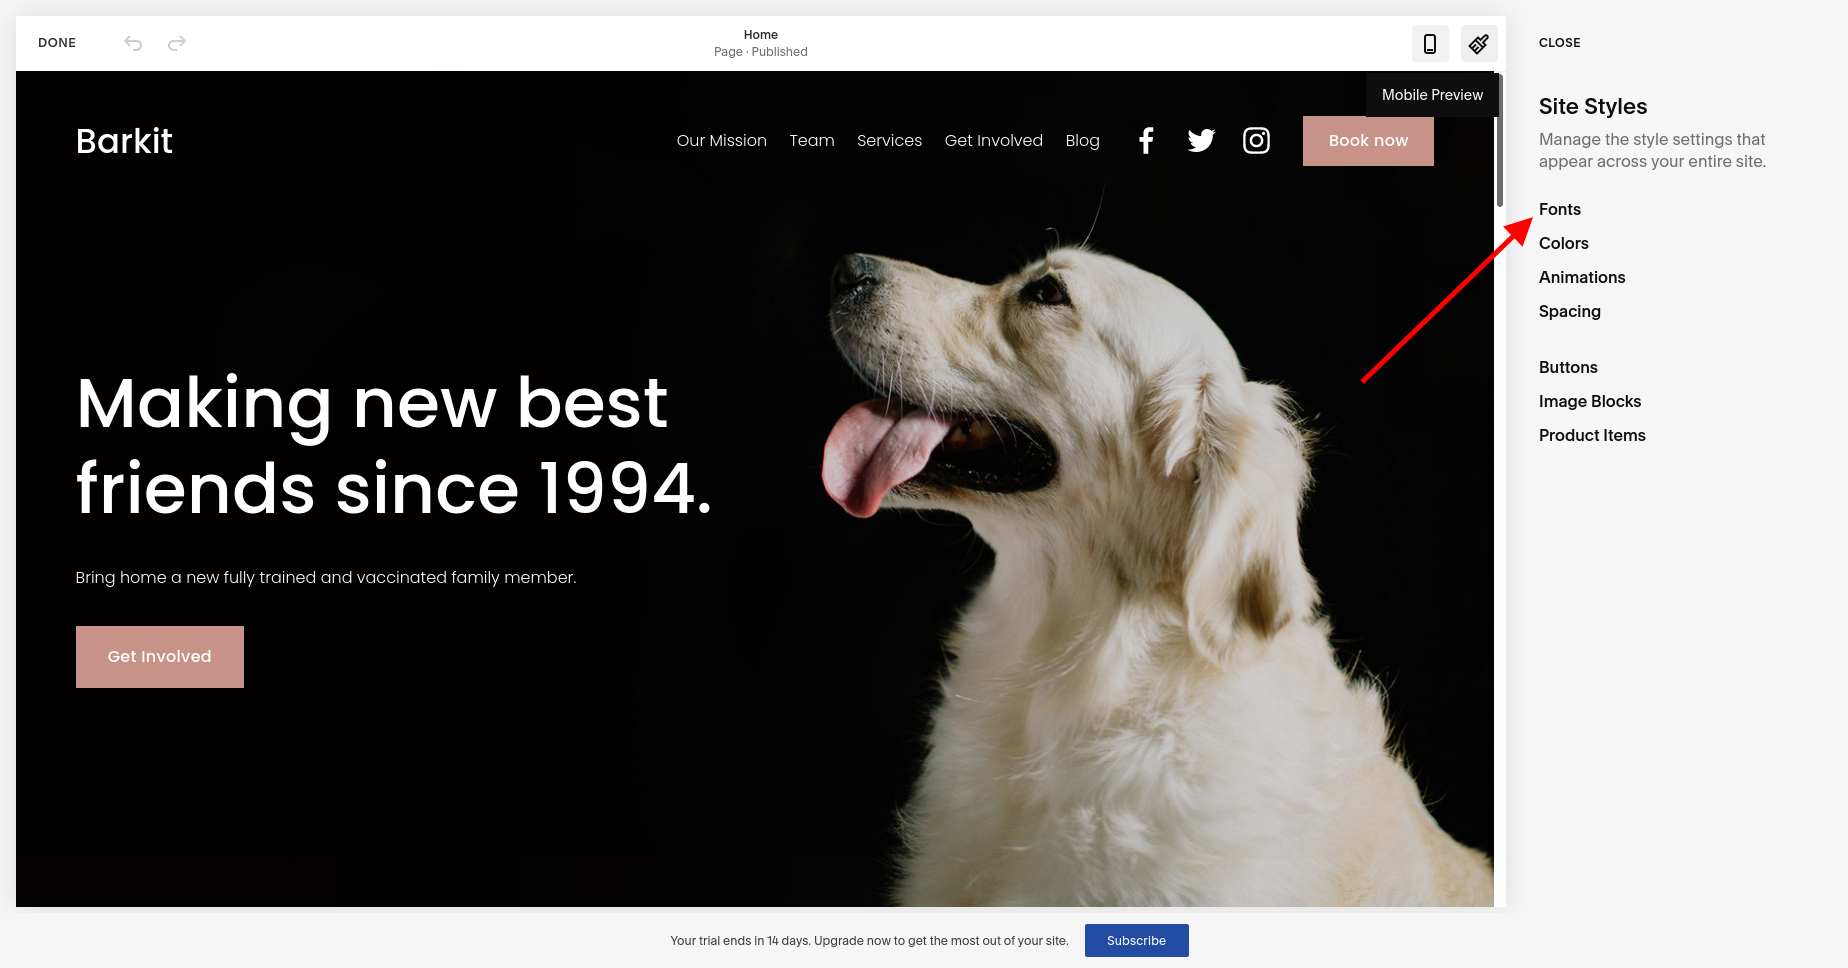
Editing fonts is a joy on Squarespace for anyone who had to scroll through an endless font list to figure out which ones look best and then find two that would look good together. Squarespace offers font packs with preselected fonts for headers and main text that will make your website look professional or flimsy or whatever style you’re trying to achieve.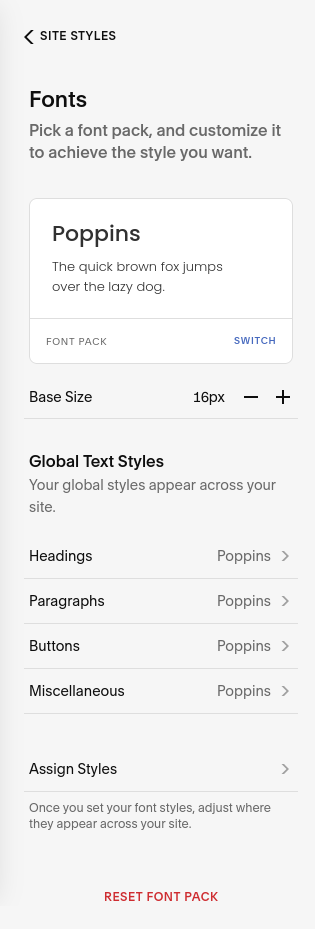
Once you choose your pack, you will see it in a preview section. You can adjust the base size of the font, which is the size of the text in paragraphs. The editor will scale other text elements as well.
Editing colors is similar. Instead of just facing a color wheel to choose your colors, you get editable color palettes preselected for the template. Choose any palettes created by professional designers and make sure all elements of your website fit together. 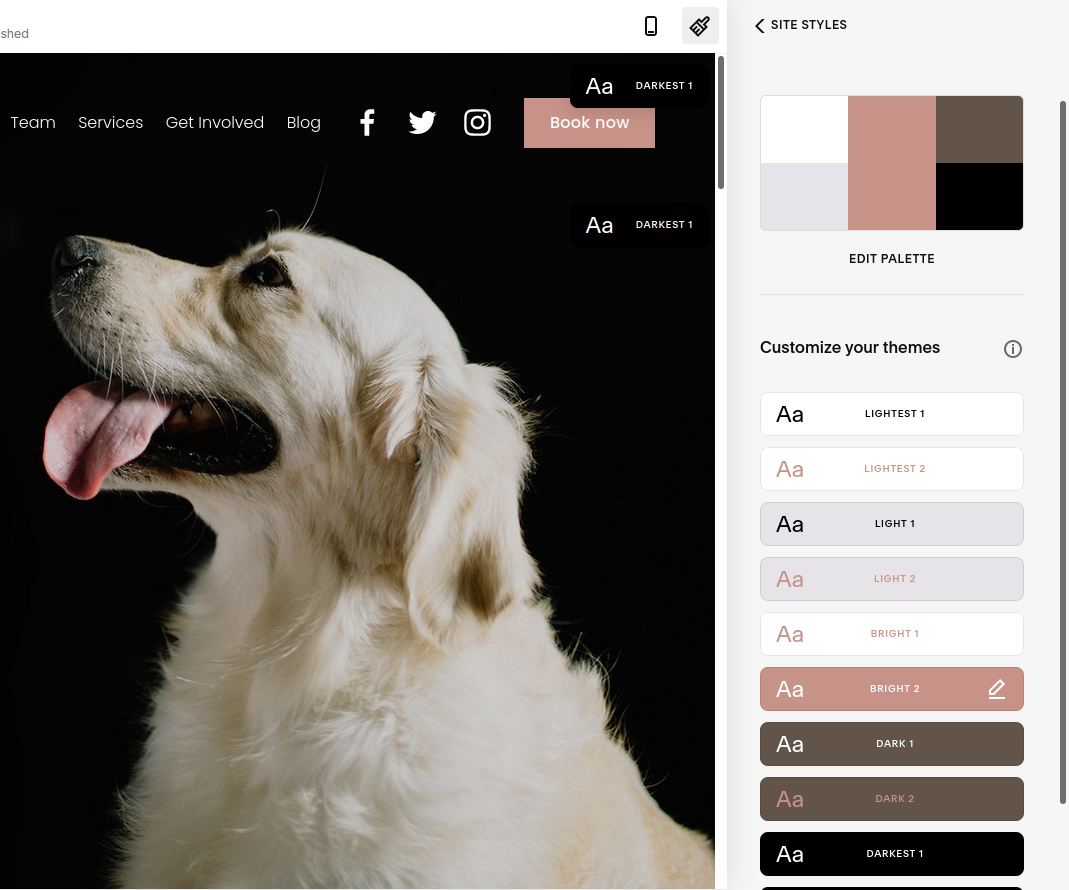
Create a palette from a picture. Just upload the image to the editor, and it will pull the colors to create matching colors for your site.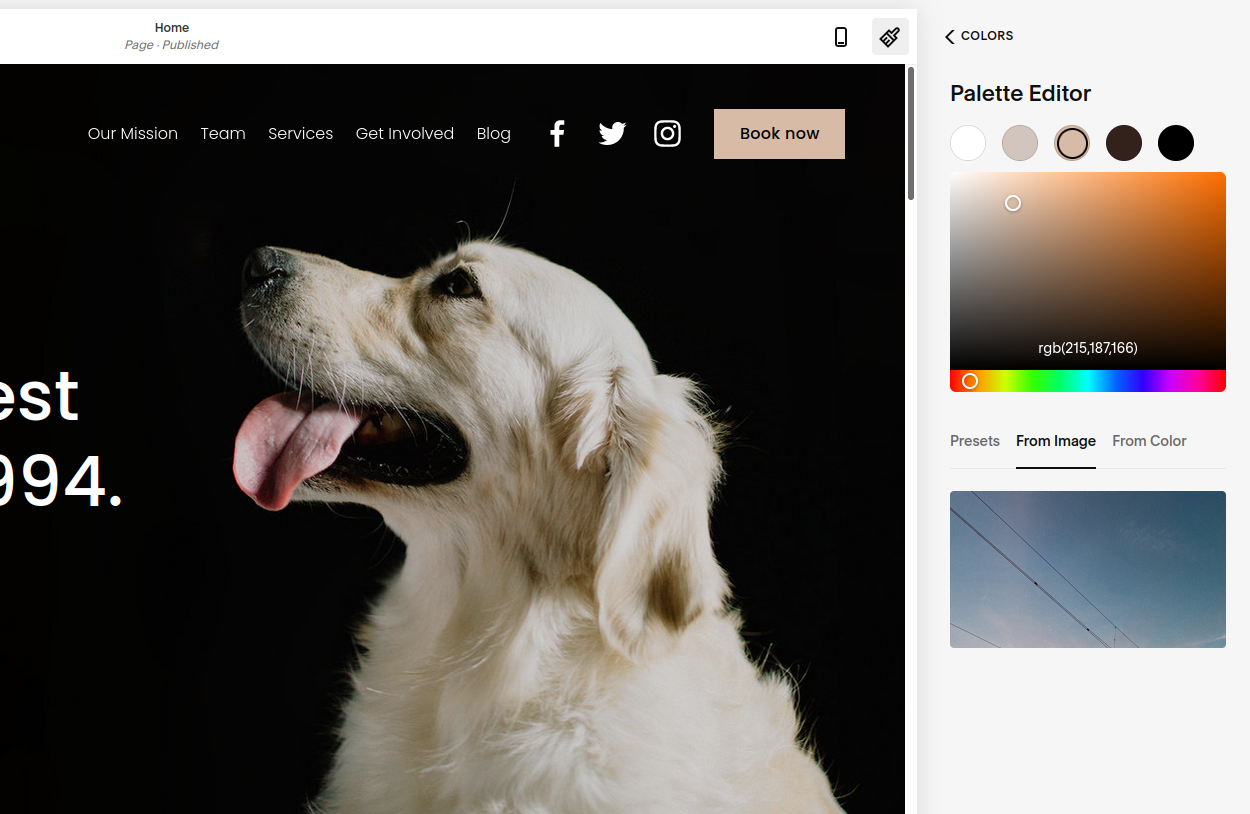
Alternatively, you can create a custom palette if you’re feeling confident. Just create a palette from color to set up something unique. If your brand already has a color palette, just have your color codes ready in your notes. This way, when you need to change the color of a button, you’ll just paste it into the editor.
You can ignore text and images at this point, as you’ll be able to change them later.
Edit the page elements.
Each element has a different way of customization available—just hover over it to see what you can do.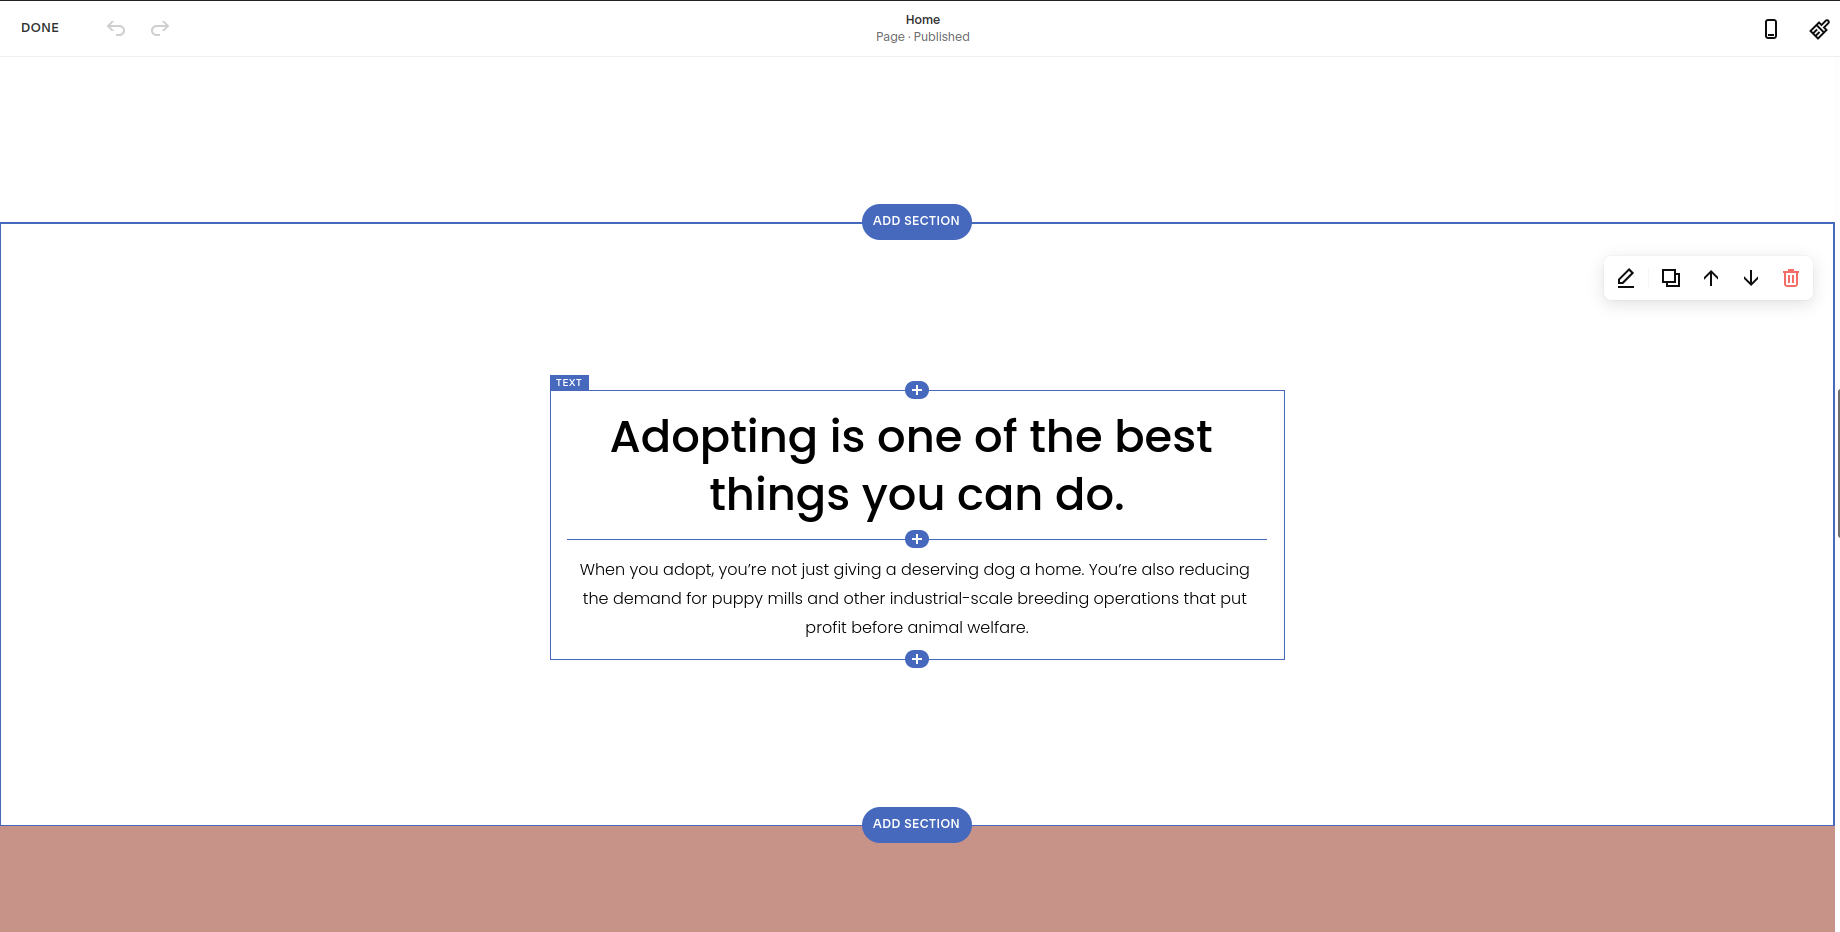
For example, when you hover over the heading, you can add a section or edit the contents. To add a section, click the ‘+’ button where you would like to see extra content. Such plus buttons will come before and after every content section. 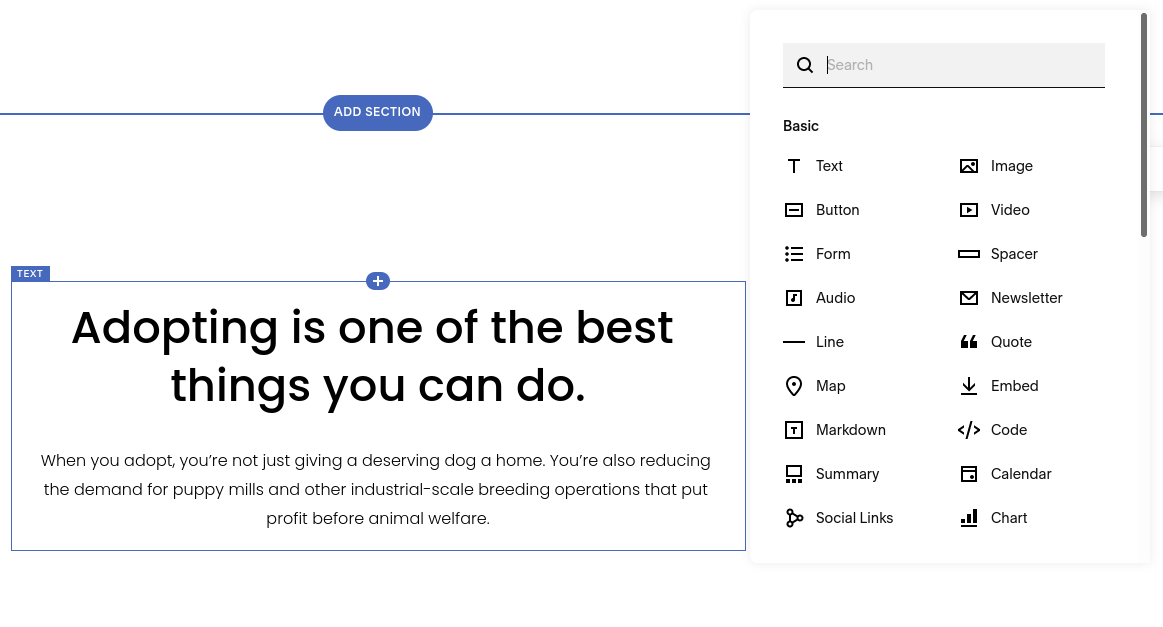
Once you click the button, a menu will come up, where you can choose an element from Squarespace’s vast library. Click on the element you want, choose the design, and Squarespace will import it with placeholder content.
If you click Edit, you’ll see an options panel to change the format, add a background image or video and choose between the palette colors.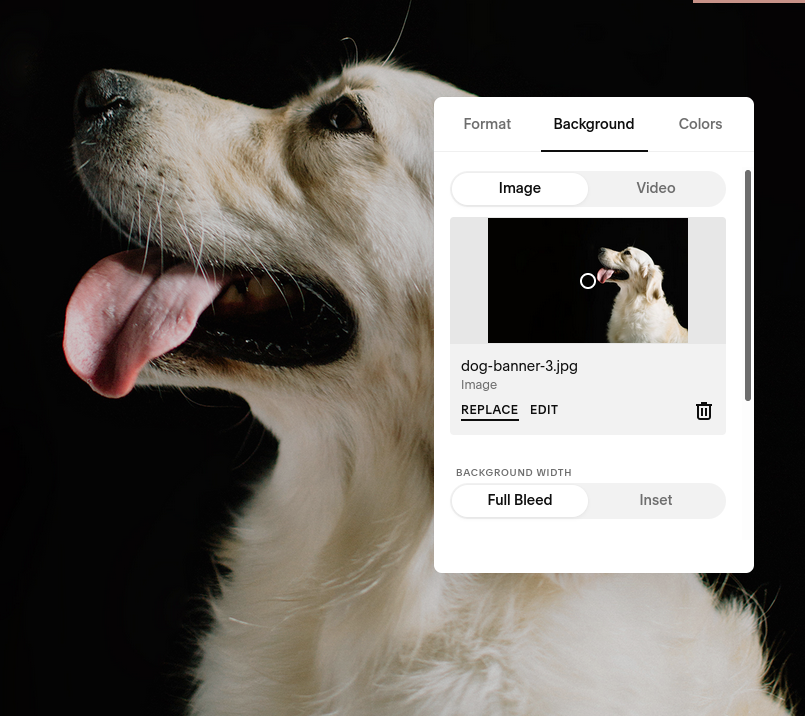
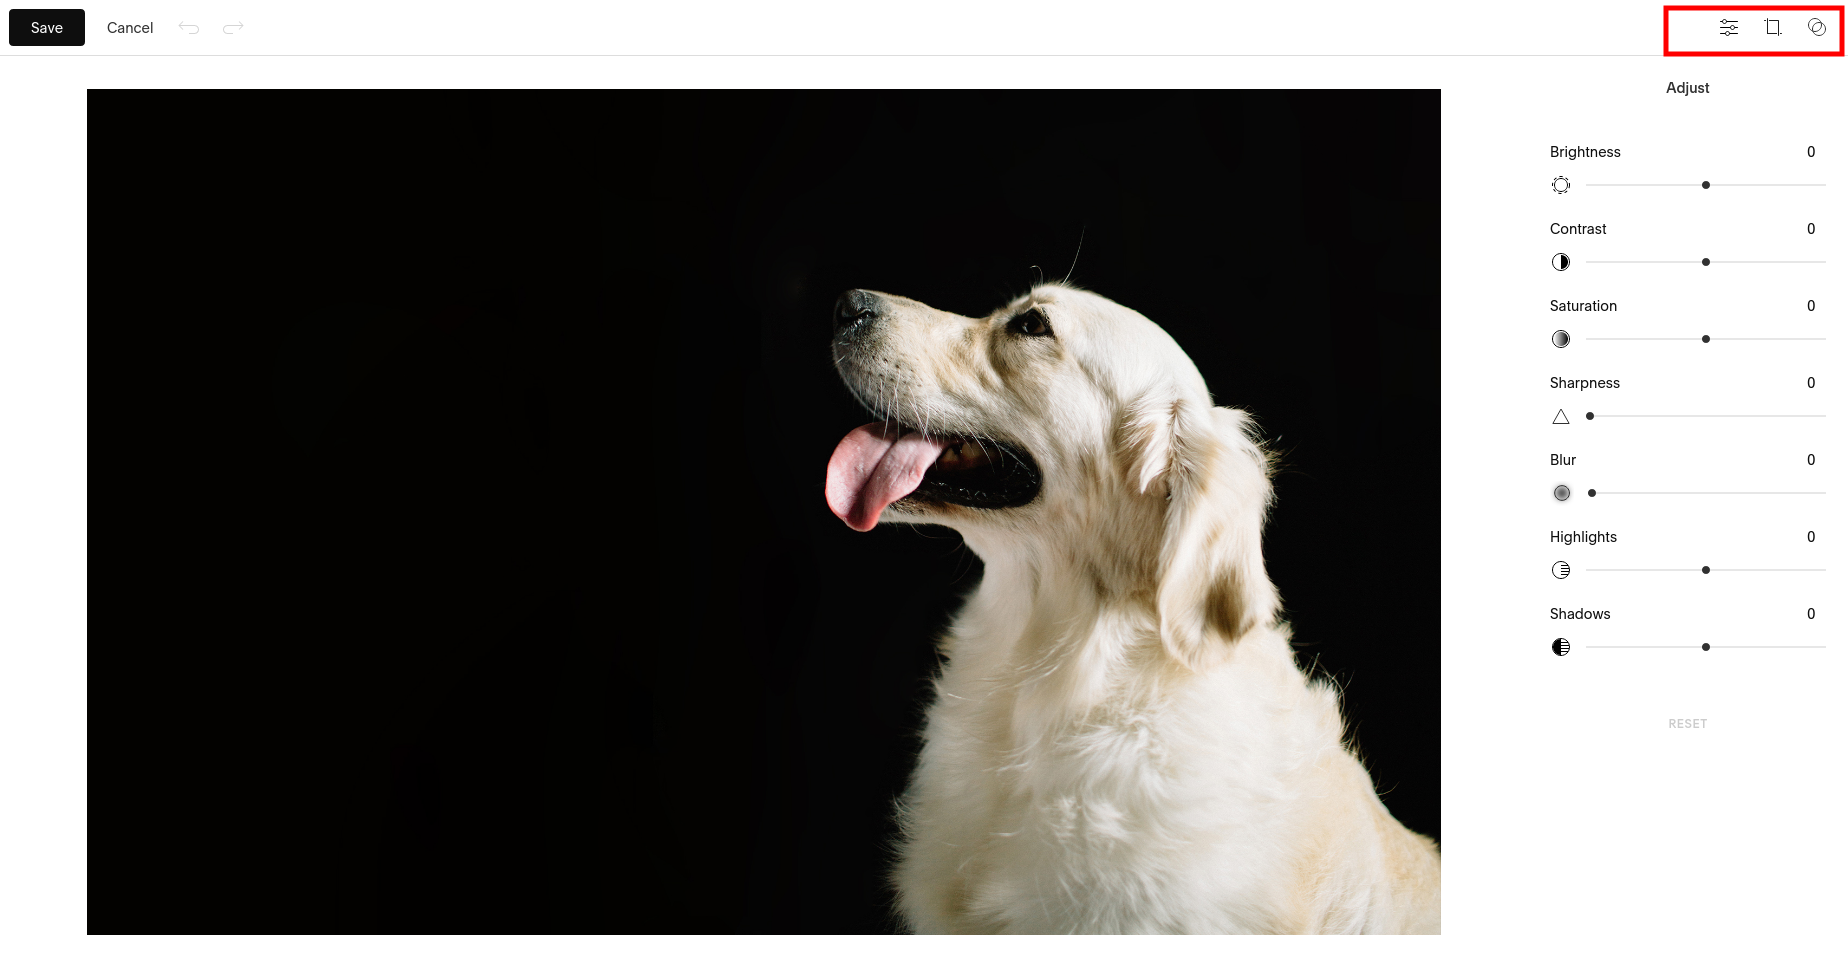
Not only can sections have these option panels, but individual page elements can also have them. For example, if you click an image, you’ll see an options panel, which will even let you edit the image in the editor by
- adjusting brightness, saturation, contrast parameters, etc.
- cropping
- changing the aspect ratio
- adding filters
 To edit any text on the page, just click on it and start editing. A simple text editing bar will appear so that you can adjust the text settings. There is no need to look for a Save button; the edits are saved automatically.
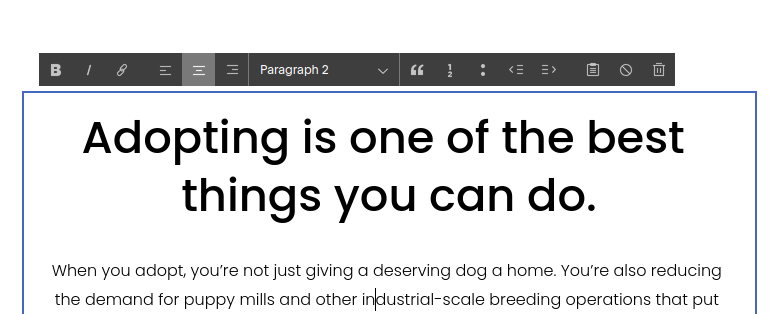
Editing texts is easy on Squarespace. However, all the texts create a copy on your website to convince visitors to use your services or buy your products. So, you might want to prepare your copy in advance so that you can replace the text placeholders for that consistent crispy feel.
You can delete any element quickly. Just hover over the element you don’t need anymore and click the trashcan icon.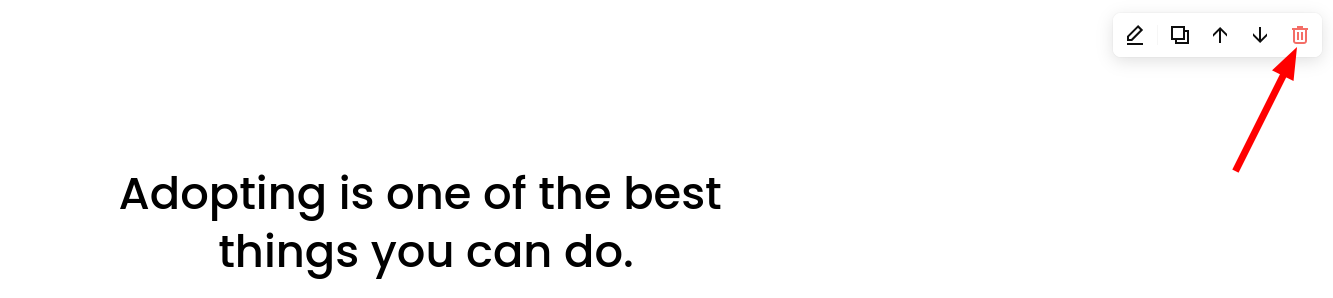
Check how your website looks on mobile.
Checking how your design looks on mobile is important, as people are more likely to visit your site using their smartphones — 60% of searches are made using mobile.
With Squarespace’s templates created to work well both on mobile and desktop devices, Squarespace will adapt your layout to look best on smartphones. To see the preview, click the phone icon in the top-right corner of the Squarespace editor.
You’ll see that the content isn’t just squeezed into a tiger space, but the columns are aligned to create the best performance. All your elements like forms and appointments will also function properly.
Make more pages.
If you want to create a one-page website, just skip this point. However, chances are you’d like to add some subpages like the About page or Testimonials page. To add a new page, click the ‘+’ button in the Pages dashboard. You’ll choose between a blank page or a page layout or choose a page that is a collection of content items.
Choosing a layout will show you a library of pre-made designs, which already match your template.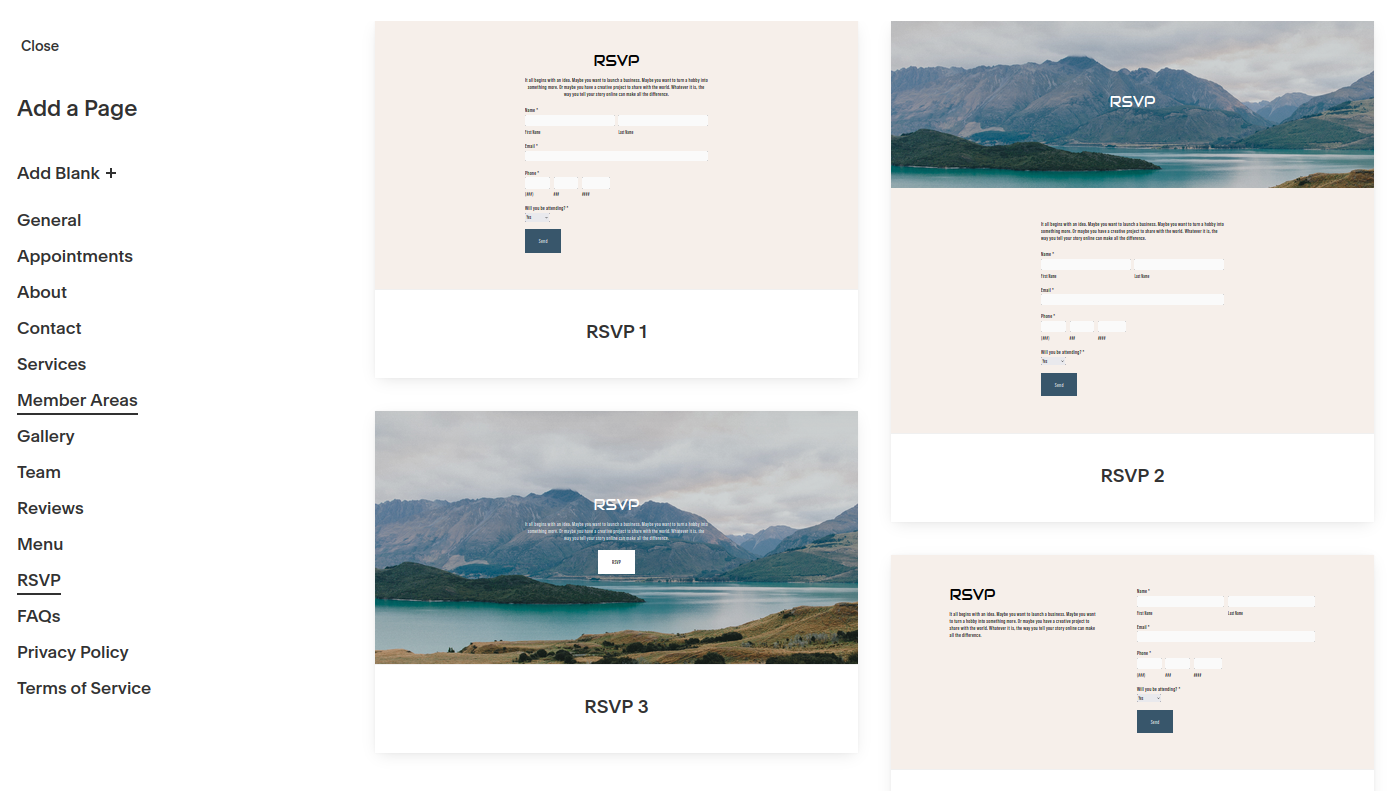
Just choose the layout you’d like to use, and it will be imported to your canvas so that you can edit it just like any other element.
If the page you want is not on the list, select Blank Page and create a design from scratch. However, this path can be more time-consuming.
Choosing a collection can make building a specific type of website so much easier. For example, if you choose to add a blog, you’ll see a collection of demo posts displayed on your page, so you’ll just need to edit the content. The online store collection will add a catalog template that will make it easy to manage products. You can edit your products and add new ones from the main dashboard Commerce → Inventory.
For example, if you want to add a Booking page to your website, choose Appointments from the layouts. It will add a page for your customers to book a session with you. 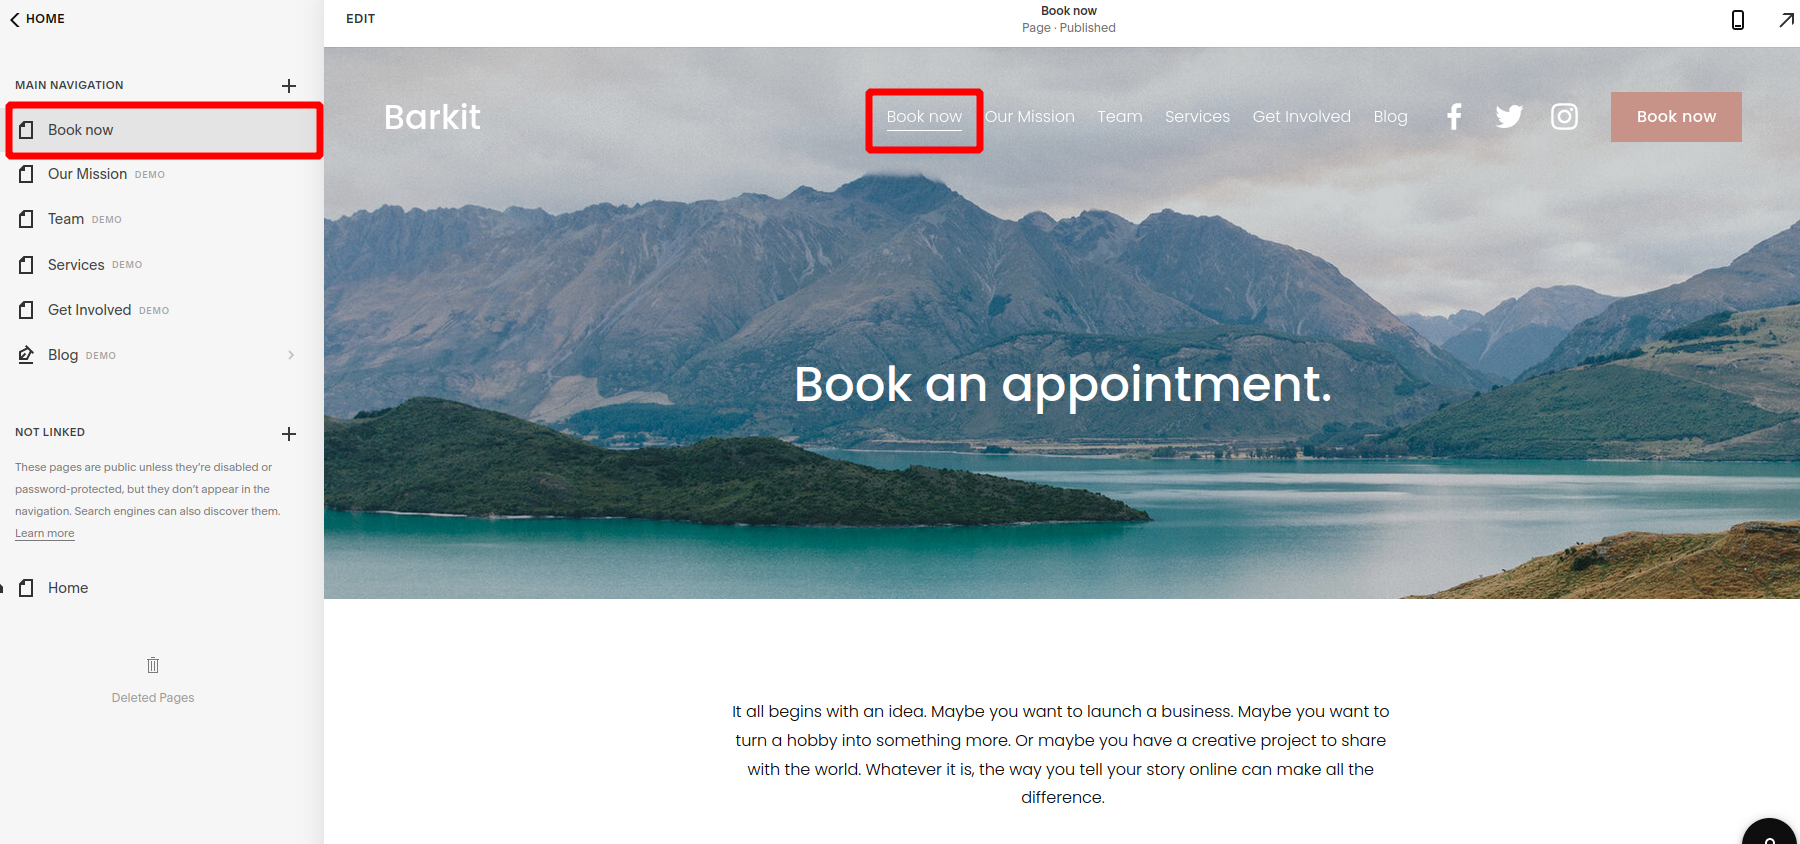
However, if you’d prefer them to book the appointments using a button, just drag this page to the Not Linked section. This way, it will not be displayed in the navigation menu. To connect this page to the Book now button, edit the header and choose the page from the list.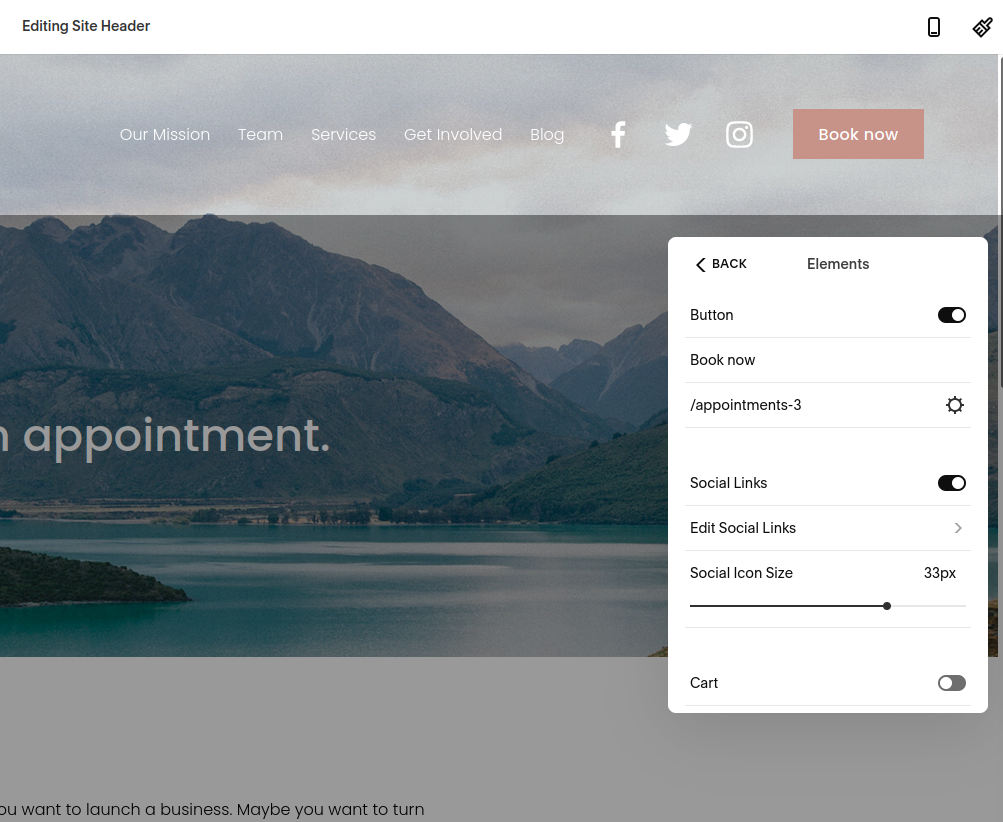
You can also replace the background image of the page you just added. Edit the element, click Replace and either upload your image or choose one from the library.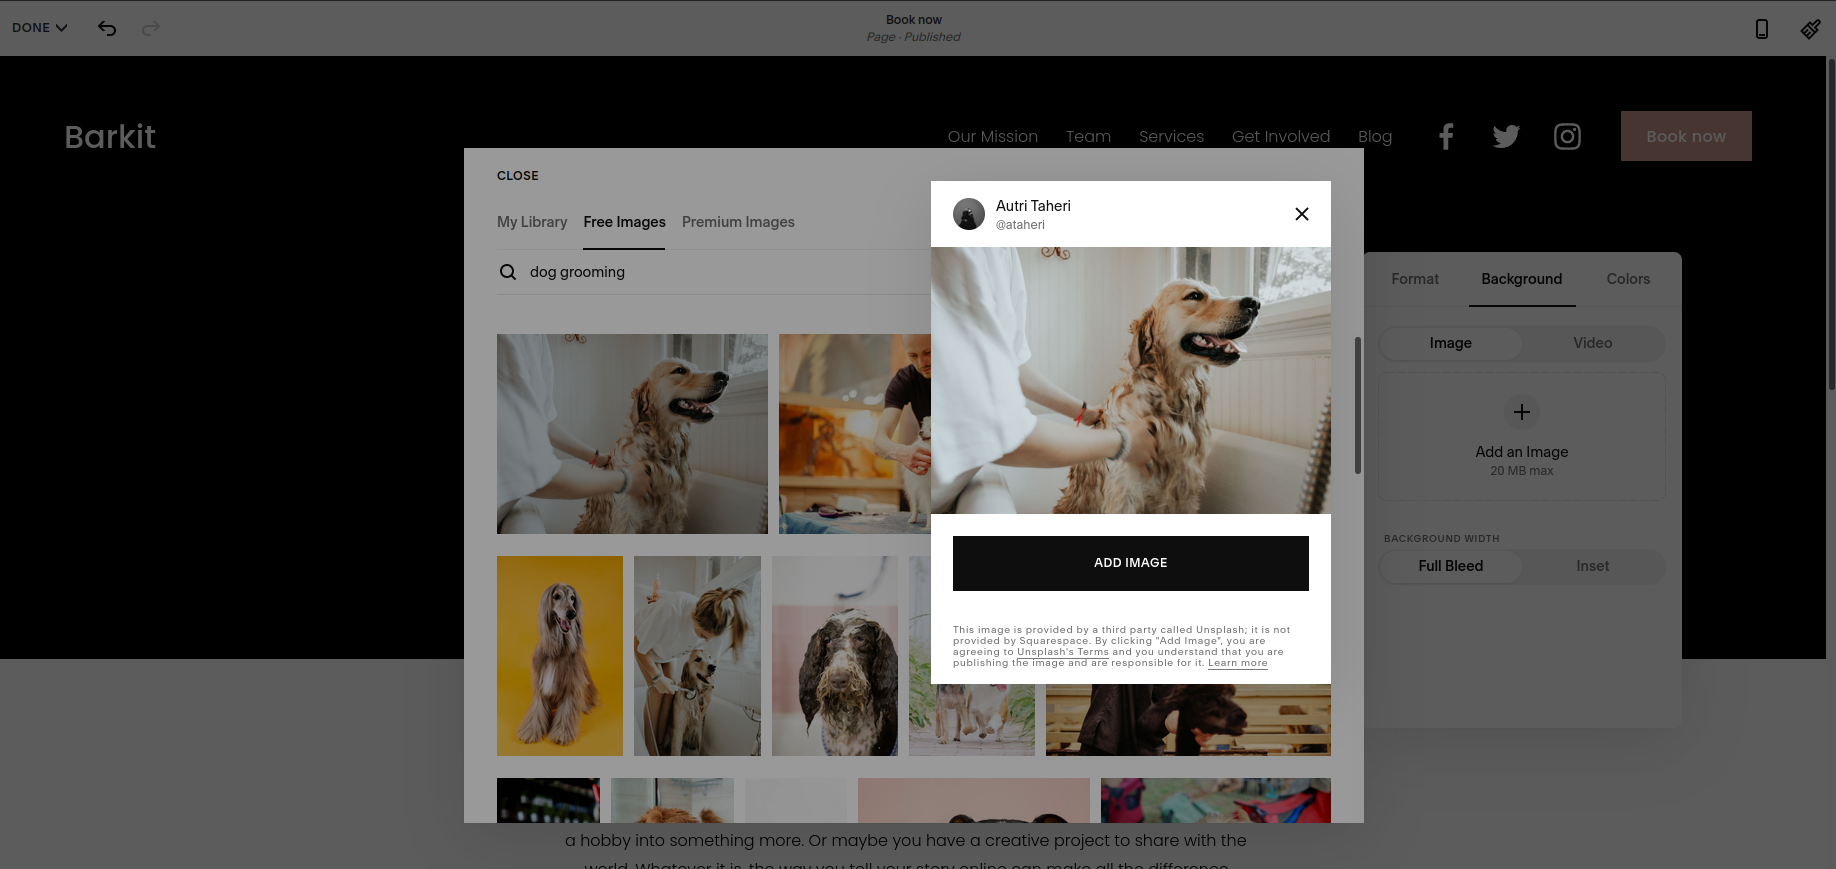
When adding the image, optimize it for SEO. You need to give it a proper name so that Google ‘knows’ what’s in there.
Edit your main menu.
To customize your menu, go back to the main Squarespace dashboard, and click on Pages. From there, grab any of the page links in the sidebar and drag them to create the order you want. 
You can display pages or make them invisible, for example, membership content or just a page you’d like your visitors to access using a button.
Add Essential Features
- Start sending push notifications.
Push notifications will help you re-engage your users and bring them to your website.
You can add push notifications to your website by following a simple integration on the Gravitec website.
Push notifications will help you recover lost visitors. You can start for free with limited features and up to 10,000 subscribers. Premium plans start from $8.7 per month and come with an unlimited number of websites.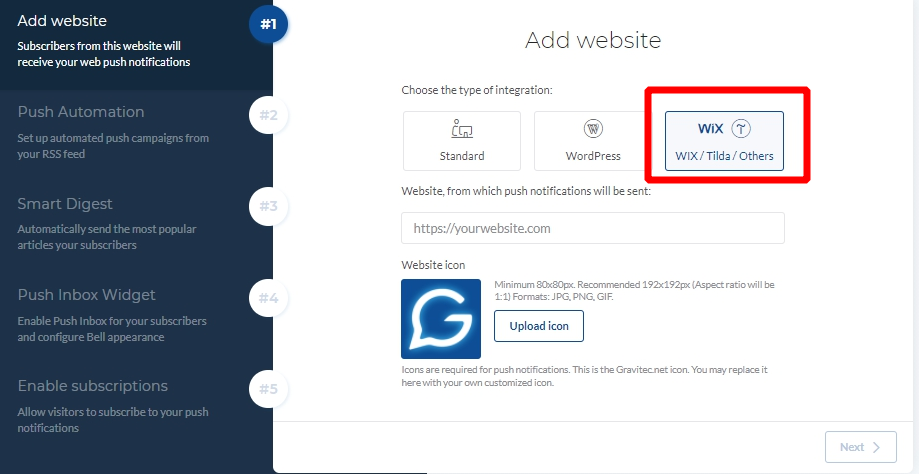
The implementation process is fairly simple:
- Choose the integration type and copy the custom script.
- To add the script to the website, go to Settings, and click Advanced.
- Choose Code Injection.
- Paste your script into the Header section.
- Click Save.
That’s it! Your customers will be getting notifications on both mobile and desktop browsers. Once you’re done with the installation, visit your website to get the push notification opt-in for the subscription.
Set up your first push notification campaign to notify visitors about a new post in your blog or send notifications about a new product.
- Boost your marketing
To connect marketing tools, you’ll need to choose at least a Business pricing plan. On the Marketing menu, you’ll see everything to promote your website, like email campaigns or SEO to drive traffic to your website.
- Check how your website is doing.
Use the Analytics tab to check your traffic sources, search the keywords and monitor your marketing activities. 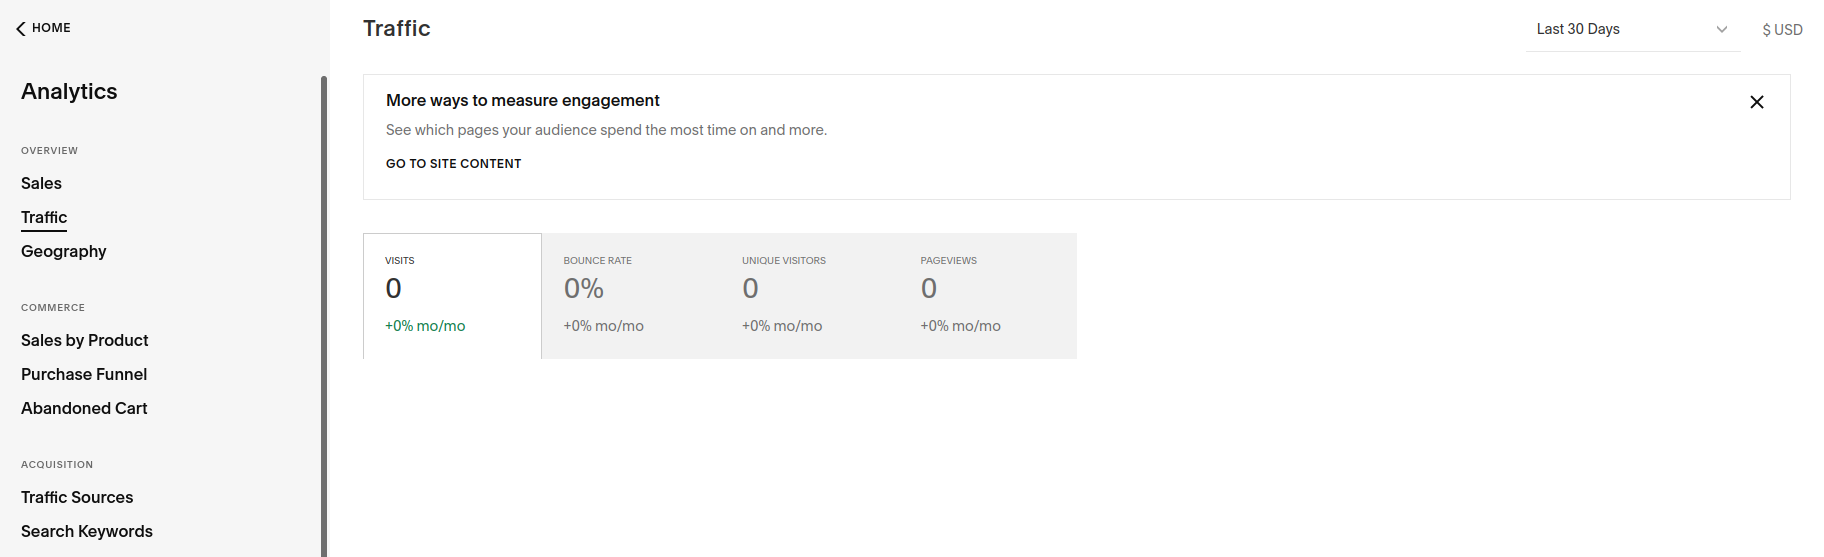
Check that your website is ready to launch
As you’re getting ready to publish your website, make sure everything’s ready:
- You like your site’s design and style.
You’ve chosen the name for your website. Colors and fonts are consistent and work well with your brand. - You have all the pages ready.
The homepage looks the way you wanted, and the navigation menu is in the correct order. All the buttons lead to the corresponding pages. - All the images are uploaded and look good.
- The site is optimized for SEO.
Your images and pages have SEO descriptions. - Check your store. If you have a store page, ensure it’s ready for your customers. For example, make a test order, and the inventory is complete with descriptions and images for all products.
- You’ve chosen the domain and subscribed to the service.
Make Squarespace site live
When you finish editing your website, it’s still private, so you need to activate it. From the main dashboard, go to Settings and click Website Availability. 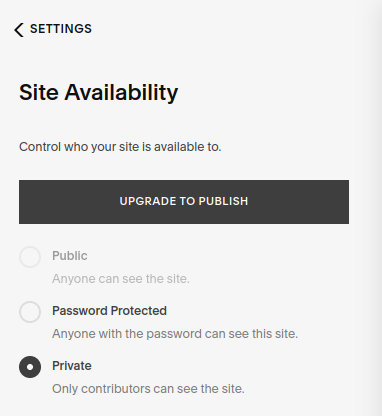
To complete the launch process, you will need to choose one of Squarespace’s plans. Here are the current pricing tiers: 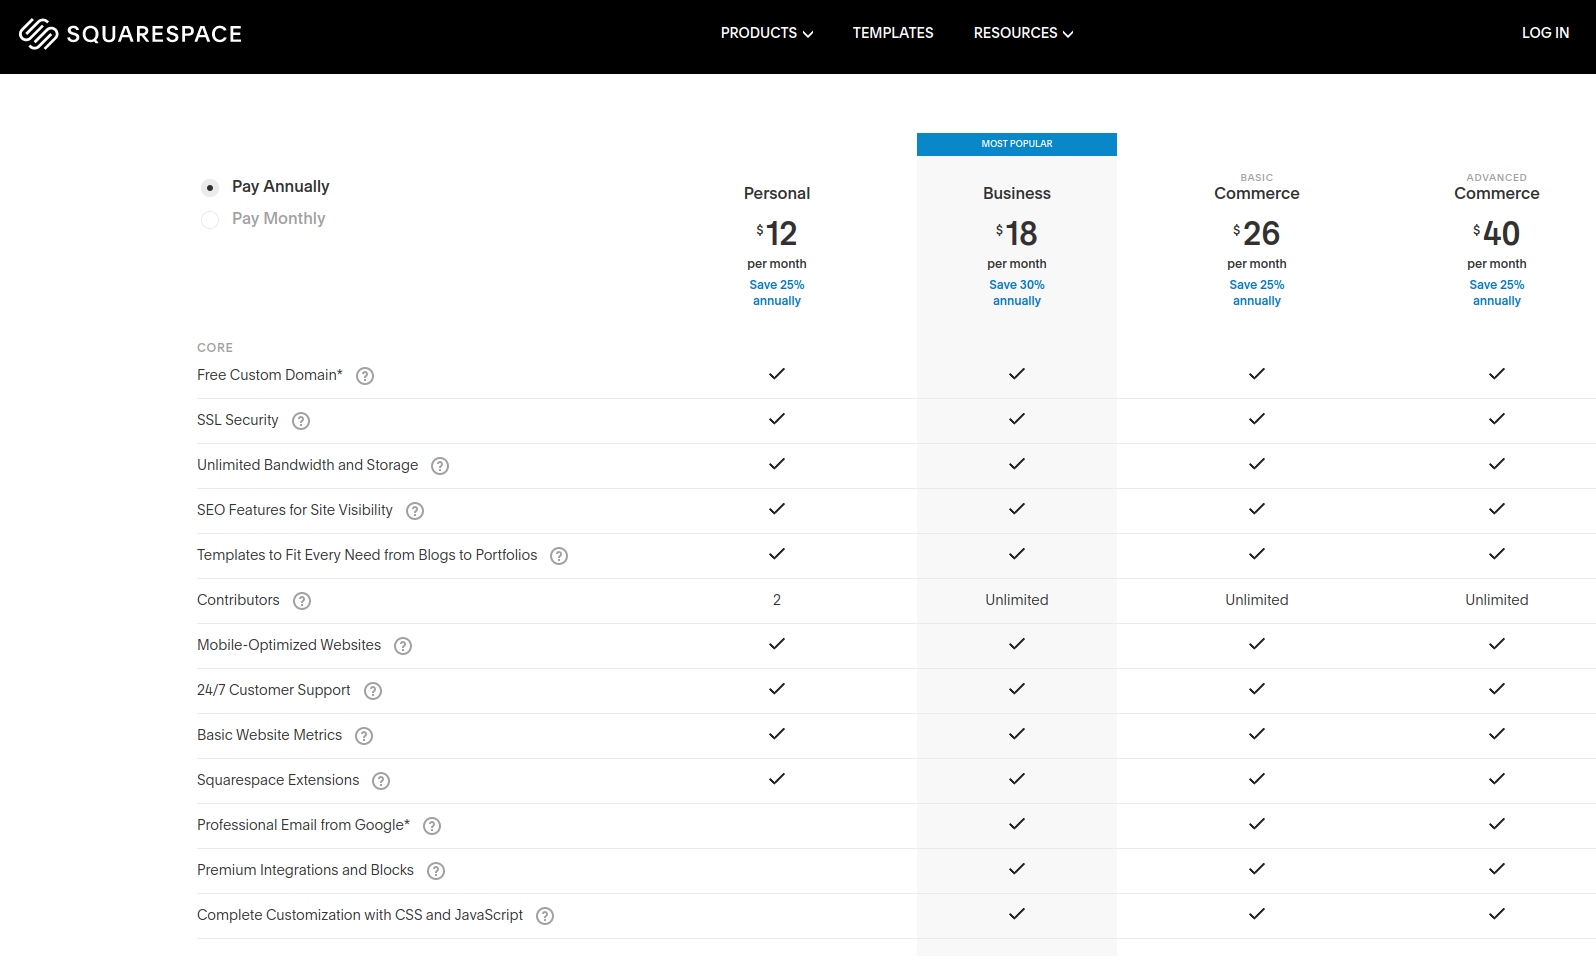
TL;DR:
- To launch a simple website, choose the cheapest plan at $12 a month.
- To start an eCommerce store, go for either Business or Commerce plans.
Once you’ve completed your purchase, your site will be available to the public.
Summary. How to Use Squarespace
Creating a website using Squarespace is quite satisfying because they take care of all the boring parts like getting a domain and offer a wide variety of templates. You can add pages like Book an appointment or showcase your services in minutes. And without much interference with creating a custom design, you can get your website out there in under half an hour.
Let’s recap creating the Squarespace website in just ten steps:
- Get started.
- Choose a sleek template.
- Choose a name for your website.
- Customize logo, fonts, and colors.
- Edit the homepage.
- Check how your website looks on mobile.
- Add or delete pages.
- Edit the main menu of your website.
- Add essential features like Analytics or push notifications.
- Double-check styles, copy, and the pages.
- Choose a pricing plan and activate your website.