Why should you build your website yourself? Well, it’s cheaper than hiring a developer or agency. It also creates a shorter feedback loop. If you see that something isn’t working with your customers, you can tweak the design or features faster than explaining it to a developer first.
With this tutorial, we’ll show you how to build a WordPress website.
Getting started with WordPress
What is WordPress
WordPress is an extremely popular CMS (content management system) that powers over 455 million websites. So, even if you don’t have a website yet, you must have interacted with one.
It’s an open-source CMS, which means you can modify the software for free. It has grown from another project called b2/cafelog, and now it has a vast community of contributors. There are no limits to the type of site you can create with WordPress, including stores, portfolios, or forums. Individuals, businesses, and even governments use WordPress. Here are some WordPress website examples:


WordPress is a very versatile solution, to the point that there are actually two WordPress platforms to choose from.
WordPress.org vs WordPress.com
WordPress.com and WordPress.org sound very similar, so they should be the same company, right? They do have some connections; however, these two projects are entirely different entities. The main difference between WordPress.org and WordPress.com is who is hosting your website. In the former, it’s you, in the latter — WordPress.com takes care of everything.
WordPress.com is a blog hosting solution with ads limitations, no themes or plugins. You can get started for free with WordPress.com, but it’ll come with a price. They use the WordPress platform to power their publishing service but come with multiple limitations. You can’t upload custom themes or plugins, and you depend entirely on their ads program without an option to choose your advertising program or write paid posts.
| – | + |
| Place your site under a subdomain like mysite.wordpress.com | Get started for free |
| You’re stuck with WordPress.com ads and branding on your site | Don’t bother with learning what hosting is |
| Disk space of 3 GB on the free plan | |
| No monetization freedom | |
| No themes or plugins |
WordPress.com offers a free plan, but if you want to get to their upgraded features, you’ll have to choose one of the plans.
WordPress.org is the official WordPress platform, the one we mean when we talk about the Content Management System (CMS). It came to be as a blogging platform, however, it got much more proficient than simple blogging. It grew and now it powers 41% of websites. It’s open-source software, which means that people can build upon it, contribute to it and use it. It also provides the option to develop and use all the awesome plugins.
| + | – |
| Install plugins | Needs to be set up with your hosting provider |
| Use custom themes | |
| Scale your website | |
| Monetization options | |
Which option is right for you? Even though there’s a learning curve, WordPress.org provides more freedom to add plugins, custom themes, control your ads and even create membership sites or online stores.
WordPress paid and free
WordPress.com lets you get started for free. However, if you do want to use your site for a commercial purpose, you will have to pay at least $8 / month on your WordPress.com plan + the cost of a custom domain name usually in the range of $15 / year.
With WordPress.org, on the other hand, you can launch a completely functional website at $35 for the first year and then $50 every year after that. WordPress.org is free to use, so where does the cost come from? You’ll need to buy a domain name and hosting for your website. A domain name is your site’s address. It typically costs from $9 to $15 a year. Website hosting is where all your site’s files are stored and where other people can reach them. The costs can vary depending on the registrar; for example, with HostGator, you’ll get a domain for $3.95 a month billed yearly, and with Bluehost, you’ll get a domain name for free for the first year hosting for $2.95 a month billed yearly.
How to create a WordPress website
We created a step-by-step tutorial, separated into different steps. Just follow the instructions to get a WordPress site in the end.
Pick a domain name and hosting
If you’re getting started from scratch, you can buy your domain name from your hosting provider. It’s often included in the introductory package. If you already have a domain name, you’ll be able to add it when getting hosting for your site.
The most popular hosting providers are:
- HostGator — free domain for a year with hosting from $2.75 a month
- GoDaddy — free domain for a year with hosting from $6.99 a month
- Bluehost — free domain for a year with hosting from $2.95 a month
- Kinsta — from $30 a month
- Dreamhost — free domain for a year with hosting from $2.95 a month
You can choose any provider, just make sure they match WordPress requirements:
- MySQL version 5.6 or greater OR MariaDB version 10.1 or greater.
- HTTPS support
- PHP version 7.4 or greater.
We’ll go for Bluehost, as they offer WordPress one-click installation and have the most experience working with WordPress. They are the first-ever hosting platform recommended by WordPress, so they will have plenty of experience to help should some questions arise. However, note that they don’t offer monthly packages, so it’s at least a 12-months commitment.
- Go to the Bluehost website, click Start building. It will bring you to a pricing page.
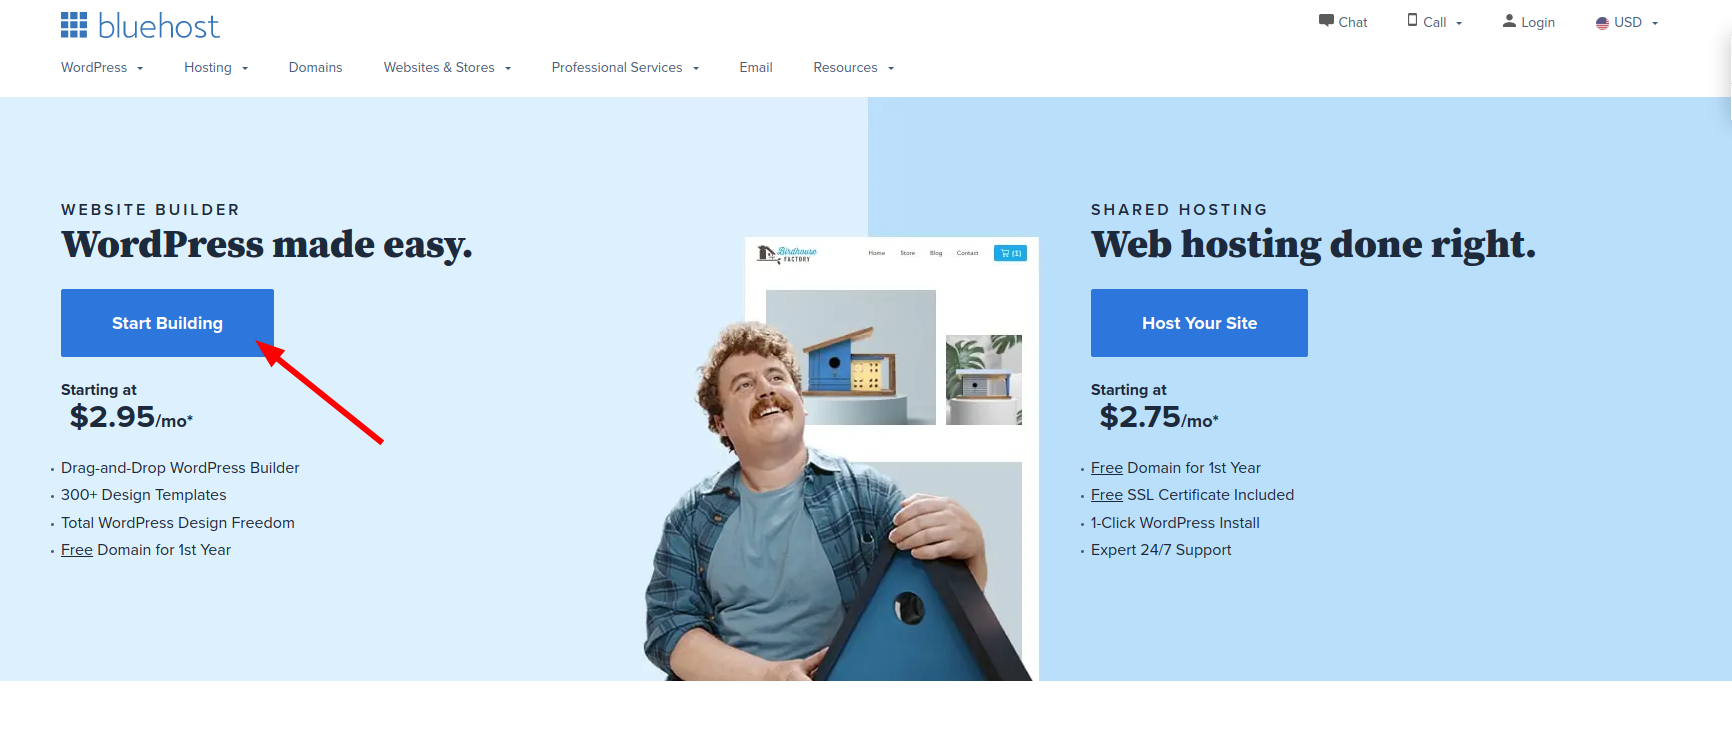

- Select a pricing plan. You’ll need higher plans if you plan to build a commercial website or a store.


- Choose a domain name or connect one you already have. There are no restrictions to a domain name, however, if you go for something totally random or complicated, people might find it harder to find and remember. A good domain name should be unique and related to the industry. For instance, if you’re making a website for a roastery, mentioning coffee or beans would be nice. At this point, you can skip the step.
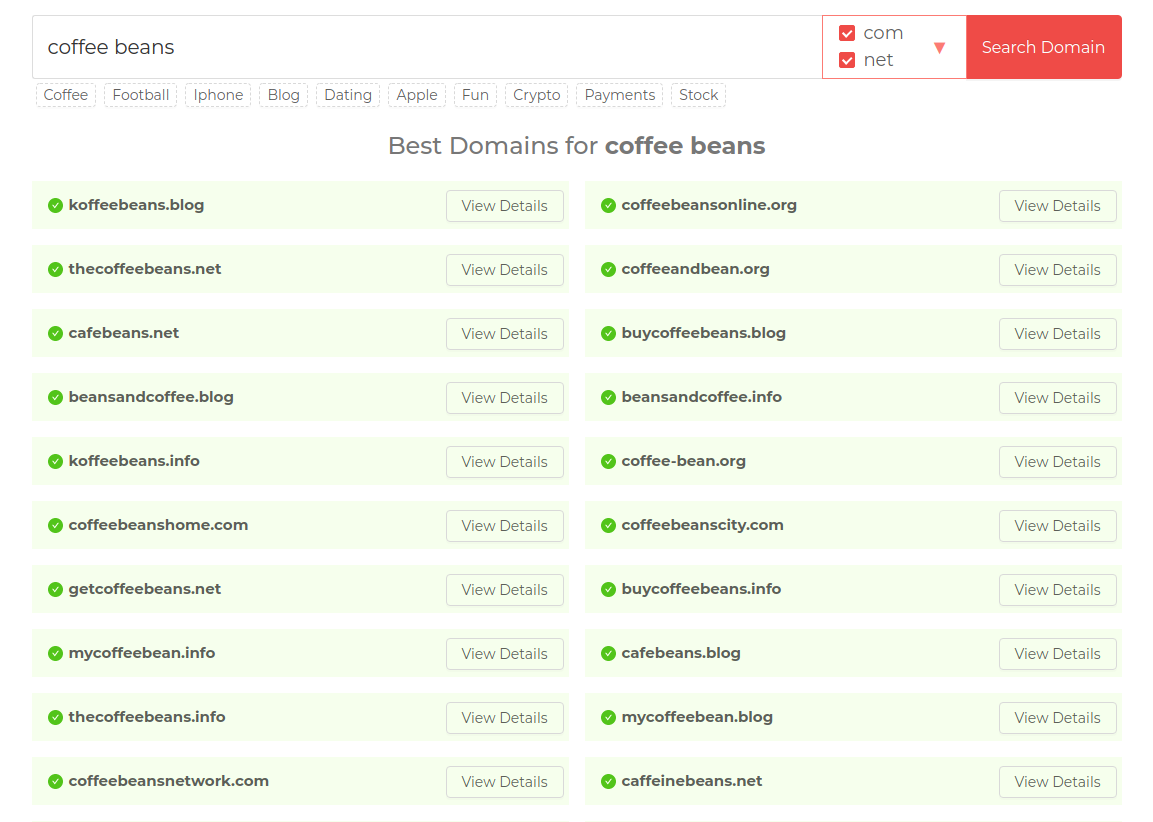

If you have no idea what domain name to use, try Domain Wheel to get some suggestions.
- You’ll be asked to add payment information to complete the purchase, you can also let Bluehost pull the information from your Google account. There are also extra options to add such as domain privacy protection or site backup. You can add them later if you decide you need them, so feel free to ignore.


Once you complete your purchase, you’ll receive an email with details on how to log in to your web hosting control panel (cPanel). This is where you can manage everything like getting support, setting up emails, and installing WordPress.
Install WordPress
Once you log in from the email you get, Bluehost will show you a wizard to create your site. Or you can go to My Sites and create a website.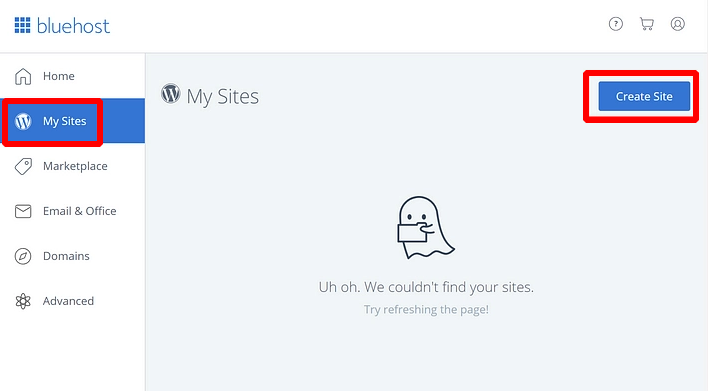
To create a website, Bluehost requires only a name and username/password you want to use when managing your website. Then just log in to your WordPress user panel under www.yourwebsite.com/wp-admin/.
 You’ll see WordPress dashboard
 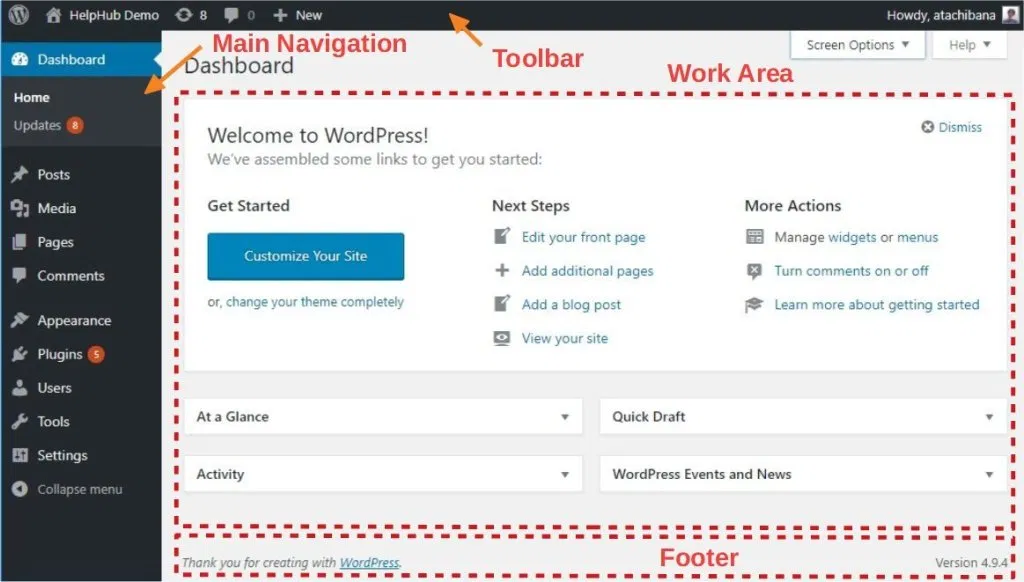 In the work area, you’ll see your current site status and what’s happening there. The navigation panel consists of the following elements:
- Posts – creating blog posts
- Media – uploading/managing images and other media files
- Pages – creating sub-pages
- Comments – moderating comments.
- Appearance – changing your site’s design here, customizing how certain things are displayed
- Plugins – installing new plugins
- Users – managing admin profiles
- Settings main settings
Once WordPress is ready, you can customize your design and add some neat functionality with WordPress plugins.
Choose a theme
WordPress works with designs that can be easily changed — themes. By default, all websites start on the basic theme, which is ok but doesn’t offer much visually. If there’s an update available, you’ll see it in your Appearance section.
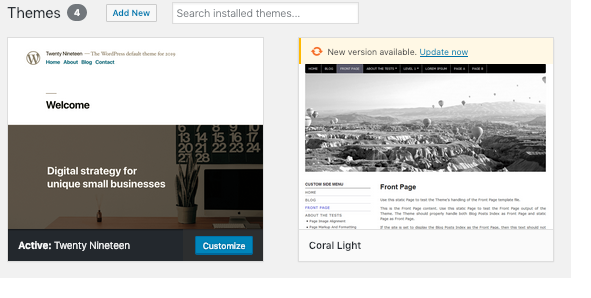
To change the default theme that comes with WordPress, go to Appearance > Themes > Add New. From there you can browse the official repository. Once you’ve found something you like, click Install and then Activate. There are thousands of themes in the official repository, but that’s just the tip of the iceberg. To see what’s there, sort them by popular, latest, featured, or by feature filters (i.e. industry, layout, etc.).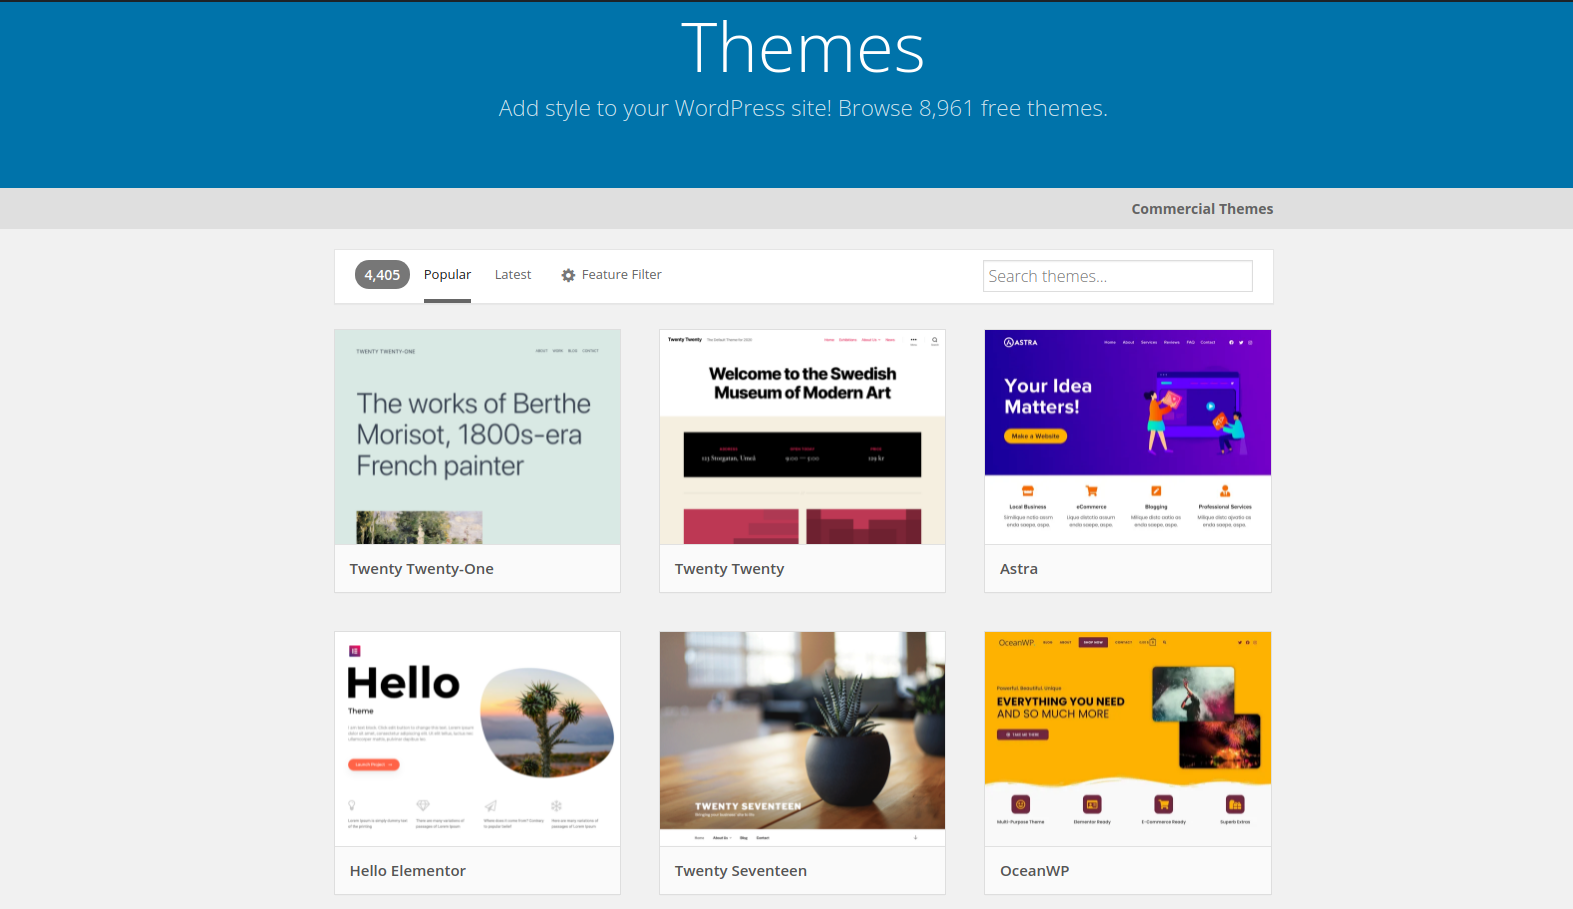
There are theme marketplaces like Theme Forest, independent theme stores, such as Elegant Themes, or aThemes. Make sure the store has been around for a few years and offers an array of themes. Whether you’re looking for a free or paid theme, check that the support is offered and the developer answers questions or supports requests. In addition to your theme, you can further customize your pages with a WordPress page builder tool.
The installed theme can be customized by clicking on the Customize link under the Appearance menu. There’s no need to finalize all the theme settings, you’ll be able to get to it later. After activation, you can see how it looks simply by going to yourwebsite.com.
Add pages and content
On WordPress, you can add your content either as “page” or “post.” Posts are regular blog entries, which appear in reverse chronological order (newer posts are displayed first) on your blog’s homepage. Pages are used to display non-chronological website content, such as About, Contact, and Privacy Policy. Additionally, you can consider pages like Portfolio, Blog, or Store to showcase what you offer. By default, your blog posts are displayed on the homepage of your website.
In the Pages section, you can view pages, edit or delete them. With the Quick Edit feature, you can edit Title, Slug, Date, and Author, for any Page.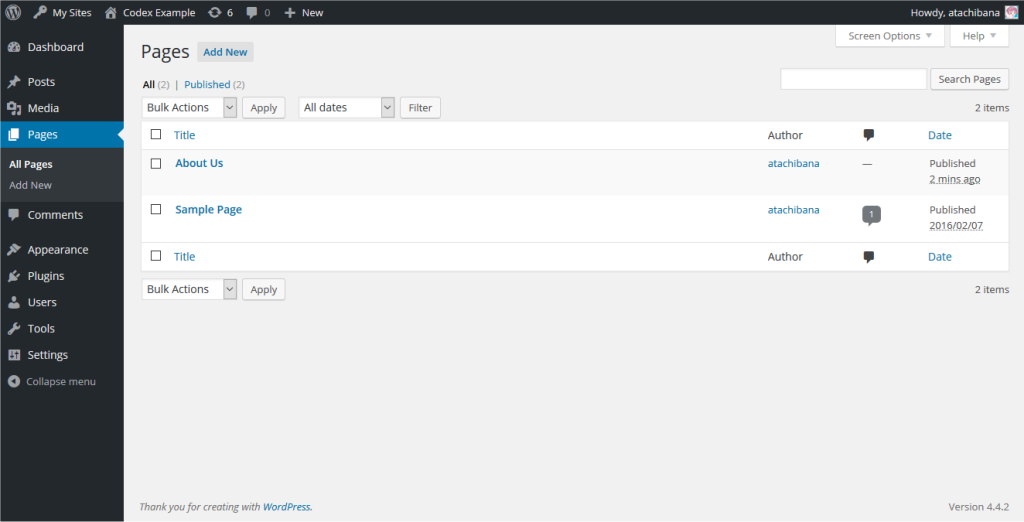
To add a new page, go to Pages > Add New. 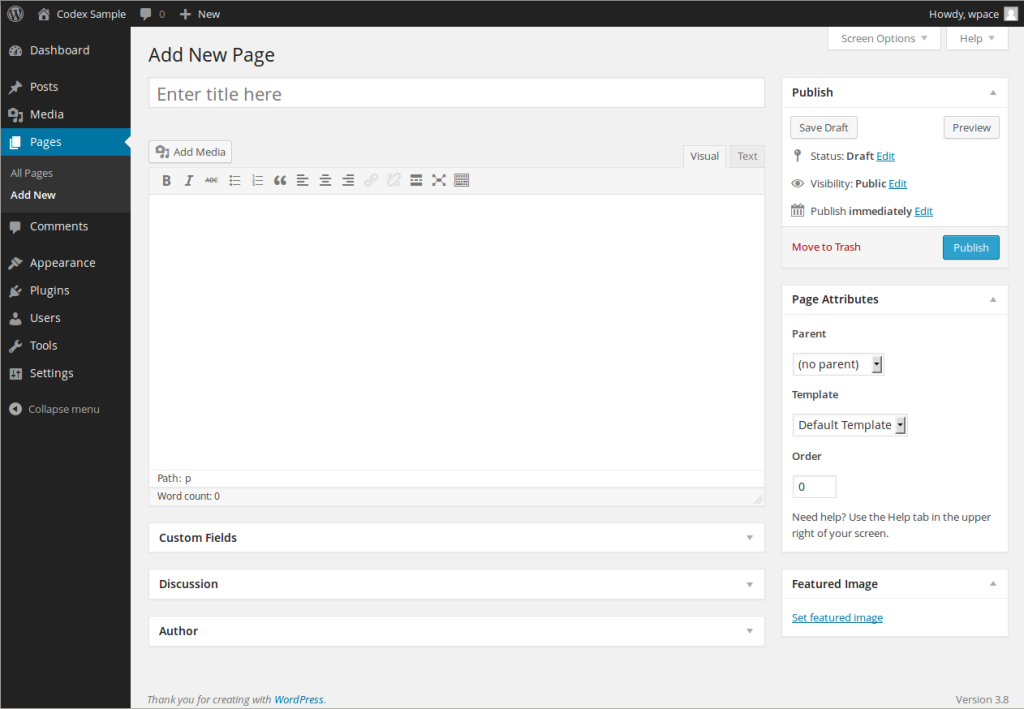
Start with adding a title, and content in the text editor below. If you want to add a subpage, select a page in the Parent dropdown on the right. The subpage will be nested under the parent page; the permalinks will also reflect their hierarchy. After adding content to your page, click the publish button to make it live on your website.
To add posts, head over to Posts > Add New in your WordPress dashboard. 
The process is fairly similar to creating a page. The main difference is that you can also organize posts into tags and categories. Categories are used for broad categories for your posts, you can also create sub-categories. Tags are like index words that describe the specifics of your posts.
You can either save your post as a draft or click Publish to make it instantly visible on your site.
Get basics right
- Set up a static front page
Go to Settings > Reading page in your WordPress dashboard. Under the Front page displays option, choose the static front page and then select Pages from the list of pages you made earlier for your home and blog pages.
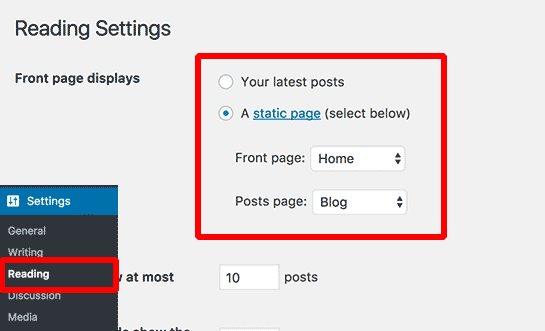
With these settings, WordPress will first display your Home page and show all your posts on the Blog page.
- Set up your site’s tagline.
By default, WordPress sets up your tagline to ‘Just another WordPress site.’ You can change it to a brief description of what your site is about. You can leave this field empty if you want the SEO plugin to override it for better optimization.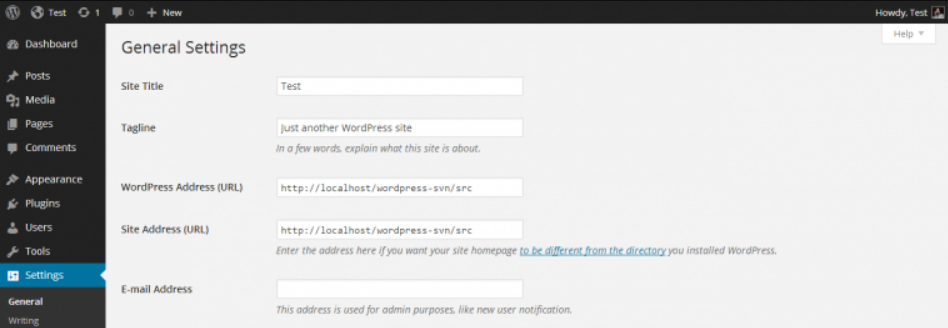

Change your site’s tagline at any time by visiting the Settings > General page. - Create navigation menu
Menus help your users browse your site’s pages and sections. Add a navigation menu by going to the Appearance > Menus page.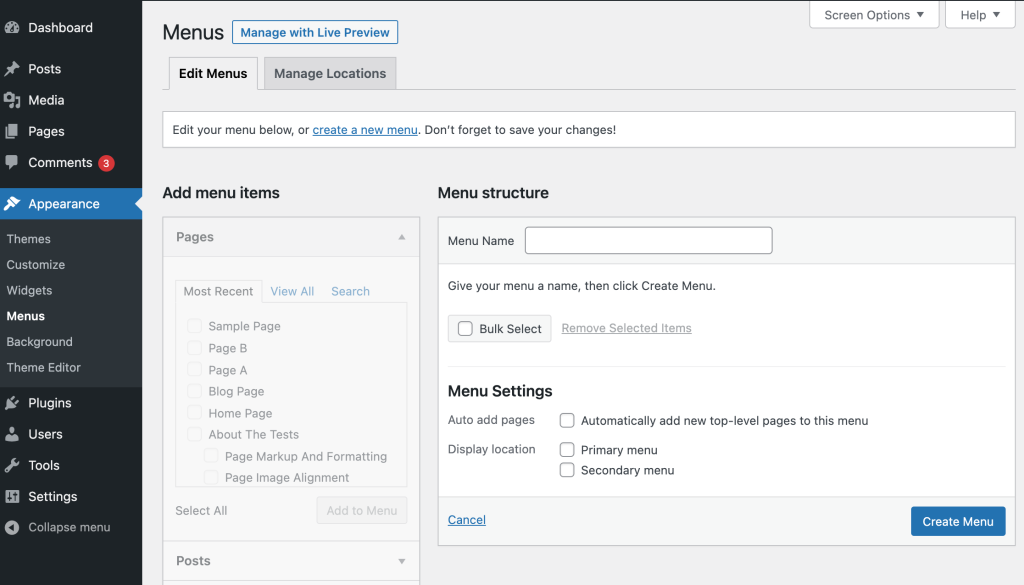
On the left, you can see pages you can choose to add to a menu. When you’re done, select the menu location at the bottom. Usually, selecting the location labeled “Primary Menu” will result in showing the menu in the top section of the website. Choose the pages you want to show up in your menu and then click on the Add to menu button. You can also add additional menus, but for them, you’ll need to change to a different location, like the Footer menu.
Now that your website is set up, you can expand your site’s features and add plugins.
Add plugins
Plugins to a WordPress website are like apps to your phone. You won’t be needing any coding skills to enhance your website’s features. You can use them to add extra blocks like contact forms, protect your site, optimize your site or turn it into a store.
Installing a plugin is fairly simple. Just search for the plugin’s name in the directory, or your dashboard > Plugins > Add New. From there, type the name of the plugin that you want into the search field, and then click Install and Activate.
Here are some essential plugins you should consider for your new website:
- Yoast SEO — to make your site more accessible by search engines.
- Wordfence Security — protect your WordPress website and enhance security.
- Udraft Plus — create automatic scheduled backups of your site.
- Envira photo gallery — add beautiful galleries to your site.
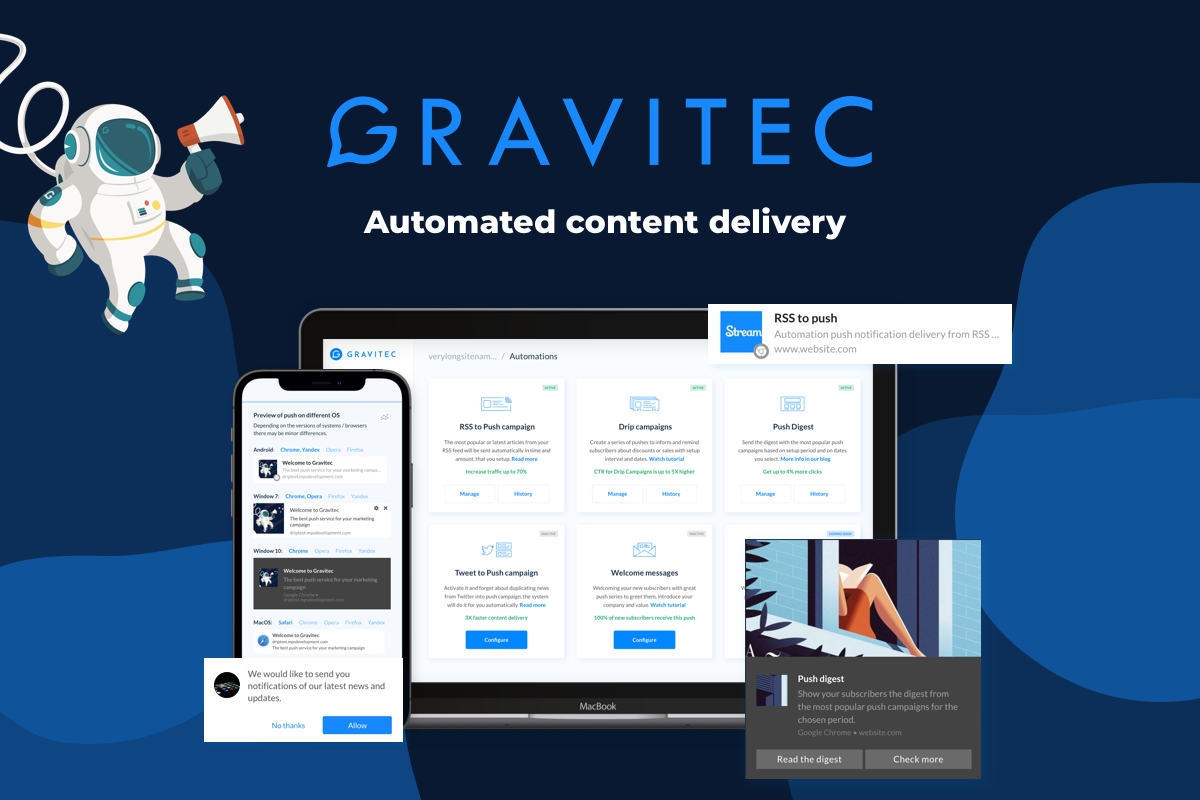
- Gravitec.net — increase traffic by sending web push notifications to your site’s visitors after they left your website.
Add push notifications to your WordPress website
- WooCommerce — set up an online store and sell products.
- WPForms — add contact forms to your WordPress site
- WP Fastest Cache — optimize your website to increase site speed
- Revive old posts — auto-share your posts at scheduled intervals.
For more recommendations, check out our list of top essential marketing plugins.
Create your marketing strategy
Once you launch your site, you need to make it visible. Here are website marketing strategies you can use:
- Content marketing
Creating content your audience will find valuable is a challenging task, however, it will allow you to build a long-lasting and trusting relationship with your readers. - SEO
SEO optimization will help your website get noticed by search engines. Most work will be done by SEO plugins. You can also add images, enable rich snippets and repurpose your content. - Email marketing
Email marketing is a way to connect with prospects and see what they’re actually interested in. You can use it in combination with push notifications, these two tactics work best together, for example, to promote your content or offer discounts. - Blogging. Blogging creates options for you to showcase your expertise, build trust and keep your site freshly updated, which can help with Google ranking.
- Push notifications marketing. Push notifications help you retain your website visitors and engage them with content updates, special offers, and targeted messages.
- Paid traffic. Paid ads are a faster way to get your website to your audience.
- Social media marketing
Create an online presence for your website, so that when users look your business up, they can see that it’s real, legitimate, and responds to reviews and issues. You can also add social media buttons to your posts. According to research, blogs that pursue social media marketing perform better in organic search than blogs that only focus on SEO. - Generate more backlinks. A backlink is a link on an external website that leads to your site, which signals Google that what you’re posting is potentially useful. You can get backlinks if you reach out to bloggers and influencers, create guest posts on other websites, interview experts on your blog and add a link to your website to your social media profiles.
Summary
Let’s recap the WordPress site-building process.
- Choose your domain name and hosting provider.
- Install WordPress.
- Select your theme.
- Add posts and pages to your website.
- Set up the navigation menu.
- Install plugins.
- Consider how you plan to promote your site.
Once the website is ready, you can promote it so that you get noticed by potential customers and search engines.