Shopify is a widely popular eCommerce builder — there are over 1.5 million stores built on Shopify. According to the statistics on about two thousand stores, the average revenue per customer is about $87. Many merchants do not want the hassle of building a custom website, so they opt for a solution dealing with all the technical details.
In this tutorial, we’ll show you how to build a Shopify store from scratch. As an example, we’ll be building a plant store that sells various houseplants.
How to get started on Shopify
Shopify is an eCommerce platform that lets merchants create online stores on their platform and sell digital and physical products to customers from all around the world. You can manage everything within one system — inventory, accepting payments, and shipping requirements. It comes with multiple benefits for merchants who work in different eCommerce models.
Why use Shopify
Before getting started with Shopify, choose how you want to go about your online store. In addition to going for the traditional path and putting your faith and money into the stock, you can choose options that provide more flexibility.
Shopify offers flexible solutions that can work for different types of business models.
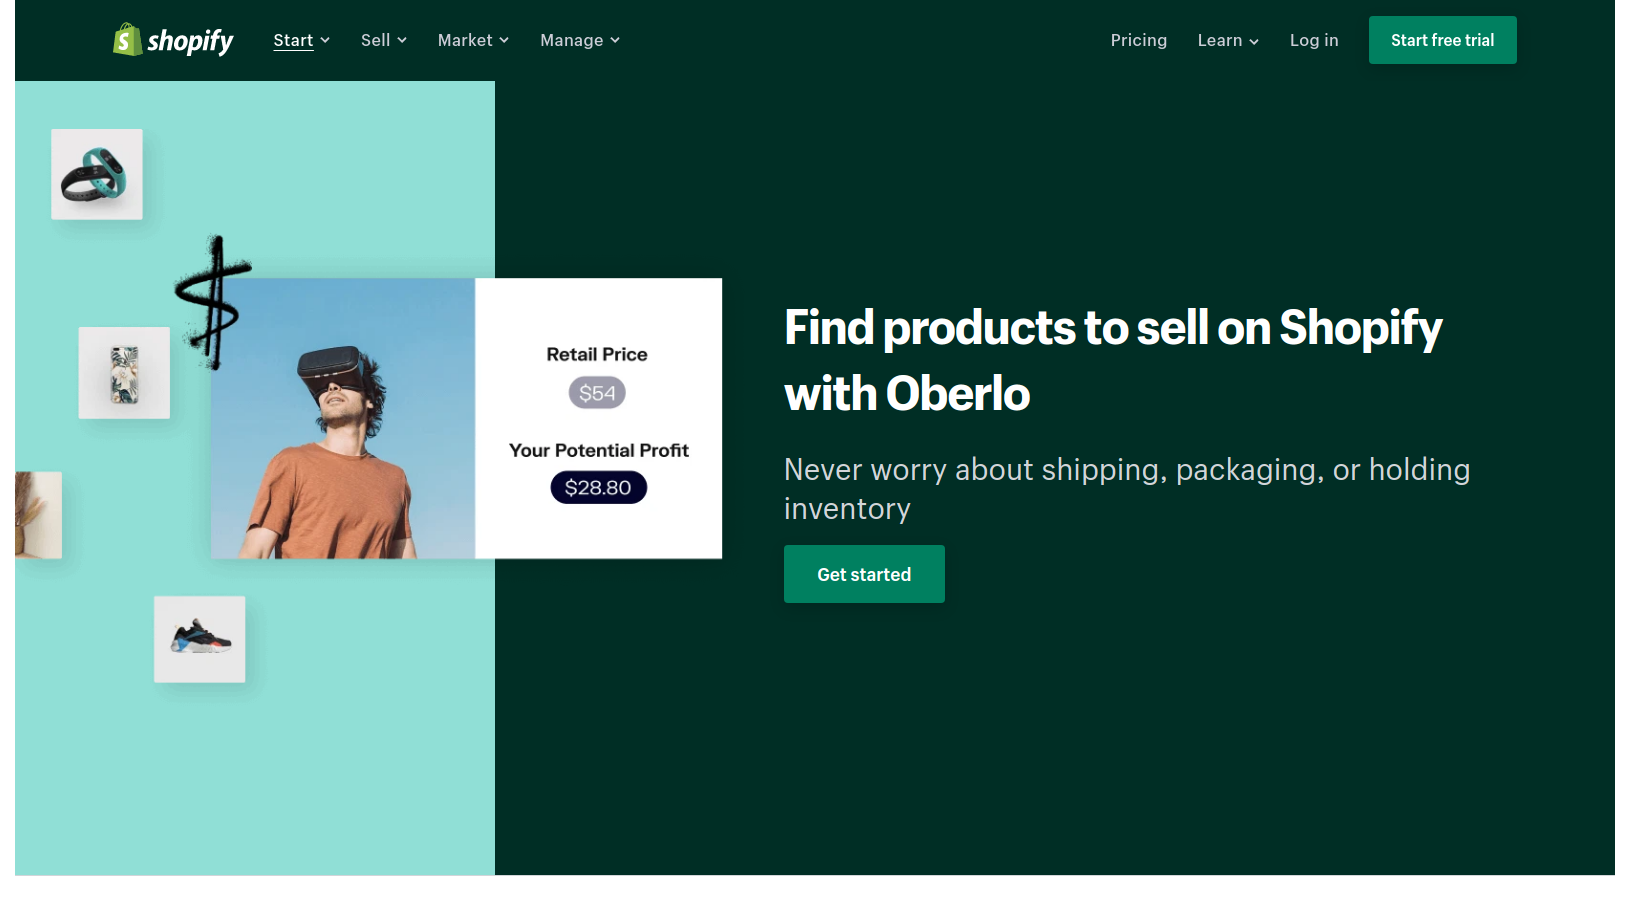
- Dropshipping lets you sell products without having to find places to store and manage products before you deliver them to your customers. It also saves you from the danger of spending all your money on stock and finding out that the demand has dropped. You choose a supplier, and then whenever someone orders a product on your website, you send their details to the company you’re doing it with. The company then fulfills the order. With Shopify, you can use services like Oberlo to link products from your suppliers to your website.

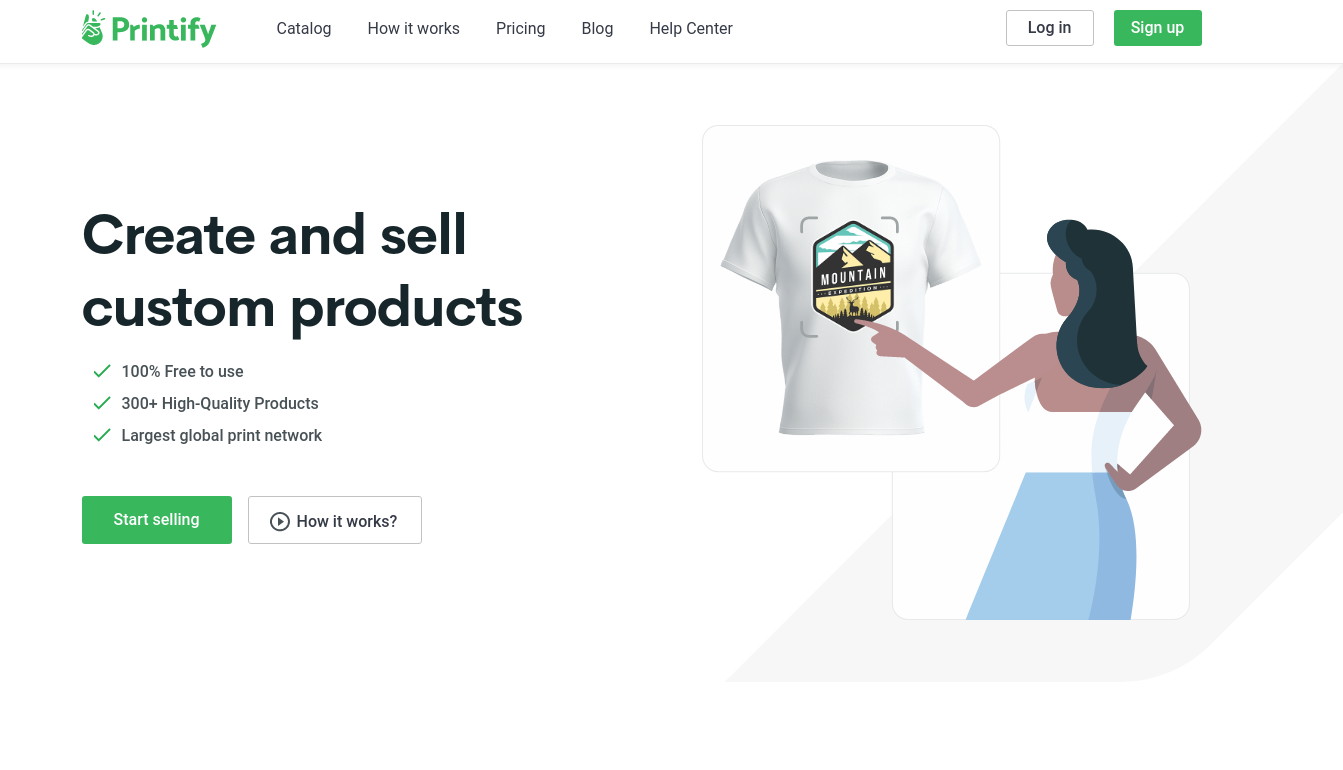
- Print on demand lets you combine your online products, like creating digital art, with a third-party supplier who customizes white-label products for you. You can use various apps like Printful or Printify to let your customers adjust designs and see how they look on a hoodie or a bag.

- Makers model will work for you if you create your product, whether jewelry or natural beauty products. Primary costs usually cover raw materials, storage, and labor. If you opt for this model, you can have complete control over the product quality and your brand. However, making your own products is time-consuming and hard to scale up, especially if your customers expect the product to be handmade.
- Wholesale is an option if you want to sell a variety of products and brands. You will sell already established products, so there will be fewer issues with building customers’ trust. It can also have a downside; if many stores sell the same products, you’ll need to work harder on your marketing strategy to differentiate from competitors. According to Shopify, it’s typical to see a 50% margin on wholesale goods resold at retail pricing, so it can be a safe choice to start your store.
- The subscription eCommerce market is predicted to reach $473 billion by 2025, so it’s another viable choice if you seek growth. Your customers are charged a monthly or weekly fee to access a product or service in this model. It’s a versatile model applied in niches like food services, subscription boxes, or membership communities.
Prices
Is making a store on Shopify free? There’s no setup fee, so you’ll be able to play around for free. However, once you’re ready to publish, you’ll need to choose your pricing plan. The price will also depend on the business model you choose. Dropshipping or print on demand will have the lowest cost, and if you sell via social media or already have a website, you can make use of the Lite plan. You can get started with any Shopify plan, and you’ll have a 14-day free trial. Shopify provides various options in their plans. You can add a buy button to your existing site or even sell via messengers without building a store on Shopify on a lite plan or support a large business on Shopify plus.
Each plan comes with different standard fees and extra transaction fees:
- Lite Plan — $9 per month + a Buy button
- Basic Shopify Plan — $29 per month + 2.9% and 30¢ per transaction
- Shopify Plan– $79 per month + 2.6% and 30¢ per transaction
- Advanced Shopify Plan — $299 per month + 2.4% and 30¢ per transaction
- Shopify Plus Plan — pricing plans start around $2000 per month + 2.15% per transaction
Every Shopify pricing plan offers a variety of features to fit different business types. Further, we’ll cover the essential ones.
How to use Shopify — essential features
Shopify is a versatile eCommerce platform that supports small businesses as well as enterprises. All pricing plans come with unlimited products, online sales channels, discount codes, and customer support. Here are features you can make use of for your store:
- Abandoned cart recovery. The average cart abandonment rate is 68.81%, so using means to prevent it from happening is a must. You can install a cart abandonment app and send cart retrieving emails and messages.
- Real-time communication. Another way to communicate with your customers is to send them web push notifications. You can notify them about a new product, remind them about a sale or offer a discount.
Set up push notifications for your Shopify store
- Shopify POS to accept payments anywhere. Point of sell is a useful app that lets you accept payments anywhere using a card reader. You can sell products in the real world and link these sales to your Shopify store.
- Create an account for your customers. You can offer your customers to sign up to finish a purchase. This way, you’ll see the purchase history and will be able to personalize recommendations and target your communications better.
- Discounts. With Shopify, you can offer coupons or automatic discounts. Instead of setting them up in the panel, you can use apps like Bulk discounts to generate discounts for free shipping or the amount spent.
- Connect Facebook. You can recreate your store on Facebook. Your customers will be able to buy from you on Facebook without going to the website, and Shopify will synchronize sales and inventory.
On Shopify Advanced, you’ll get all the basic features with some high-level customization, like custom reports, customer reports, and calculated shipping to integrate with a third-party shipping service to provide your customers with up-to-date shipping rates as they place an order.
How to set up a Shopify store in less than 10 minutes
Before you get started with your store, here’s a list of things you should have:
- The idea of what you’re selling. Why your product is special will be reflected in product descriptions and CTAs across the website, so try to get a general idea before you get started with an actual store.
- A name for your store. You can use services like Namechk to see if it’s available as a domain and on social media. You can go as random as you’d like. However, you might want to make it relevant to what you’re selling so that potential customers can find you. You’ll need to choose a domain name, so it might be best to choose a name that has at least two words, as they’re easier to find. Another option is adding keywords and trying to come up with options using a business name generator.
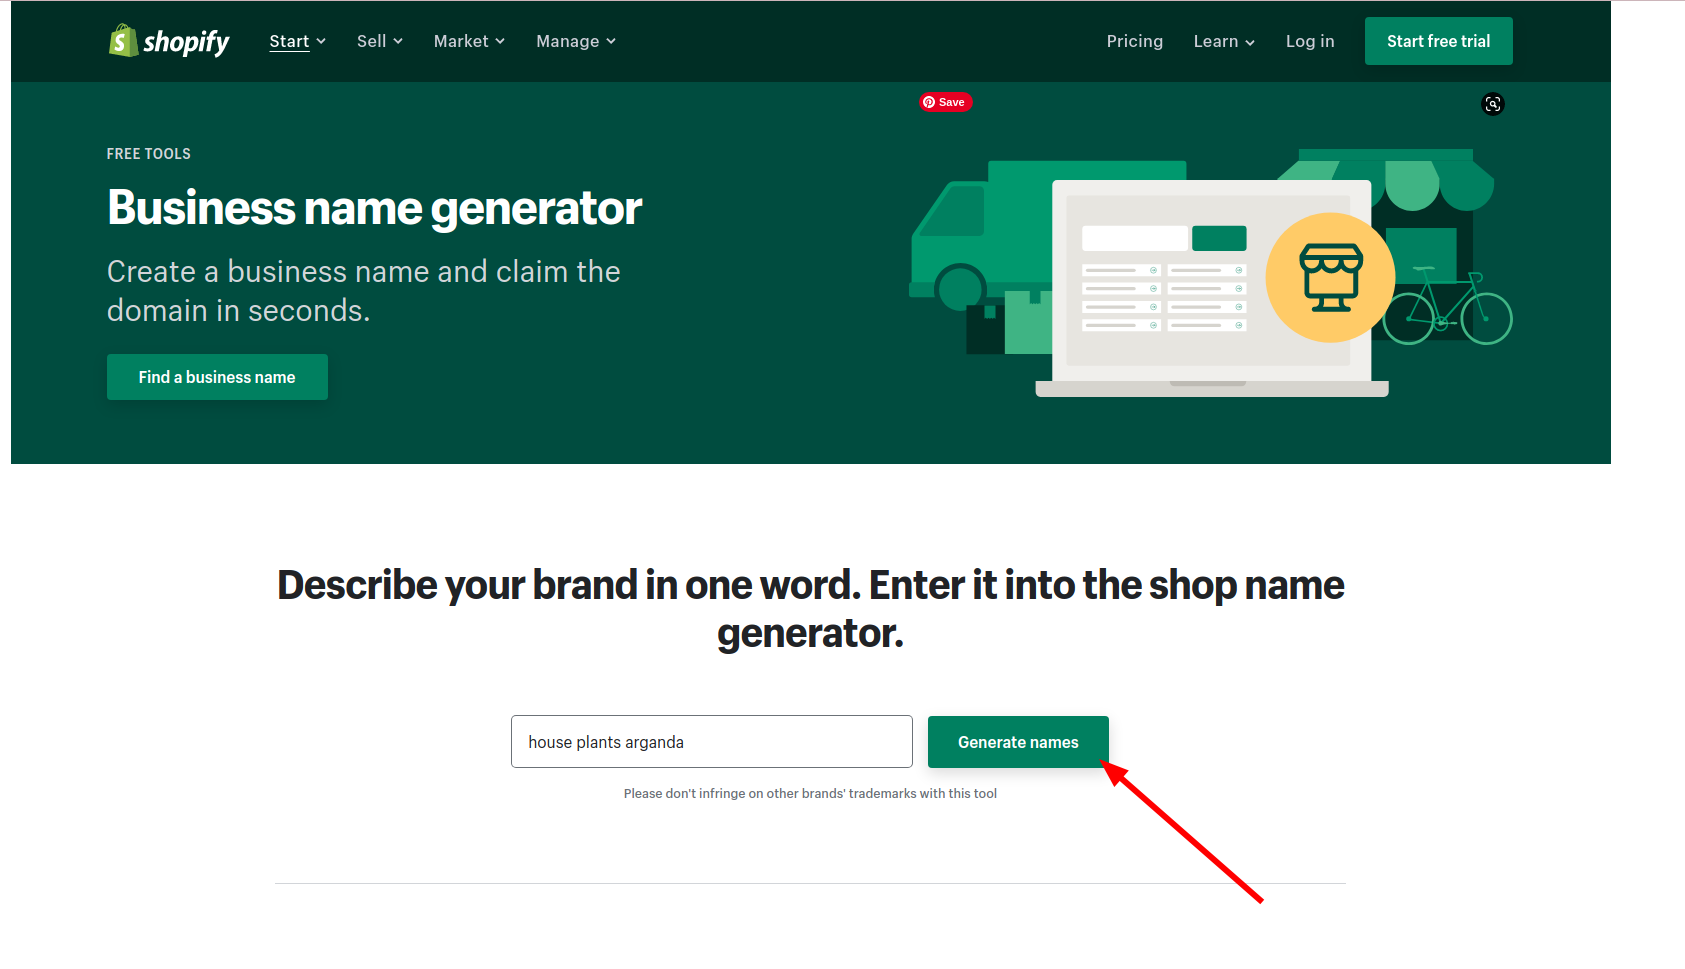

Shopify business name generator
You can use Shopify’s domain registration to get your domain and check if it has an available address.
- Something to sell. You can sell physical products, digital products, or services. If you want to sell physical products but avoid the hassle of storing and managing them, go for the dropshipping model.
- Photos of your products. Shoot your photos. The images are better to be unique. However, this part can be optional if you’re building a drop-shipping store. In this case, you can get images from product suppliers.
Getting started with a Shopify store
Once you have your product information ready, you can actually create a store. It takes about 15 minutes.
- Create a Shopify account.
Go to Shopify.com, click ‘Start your free trial,’ enter your store name, and create your store.

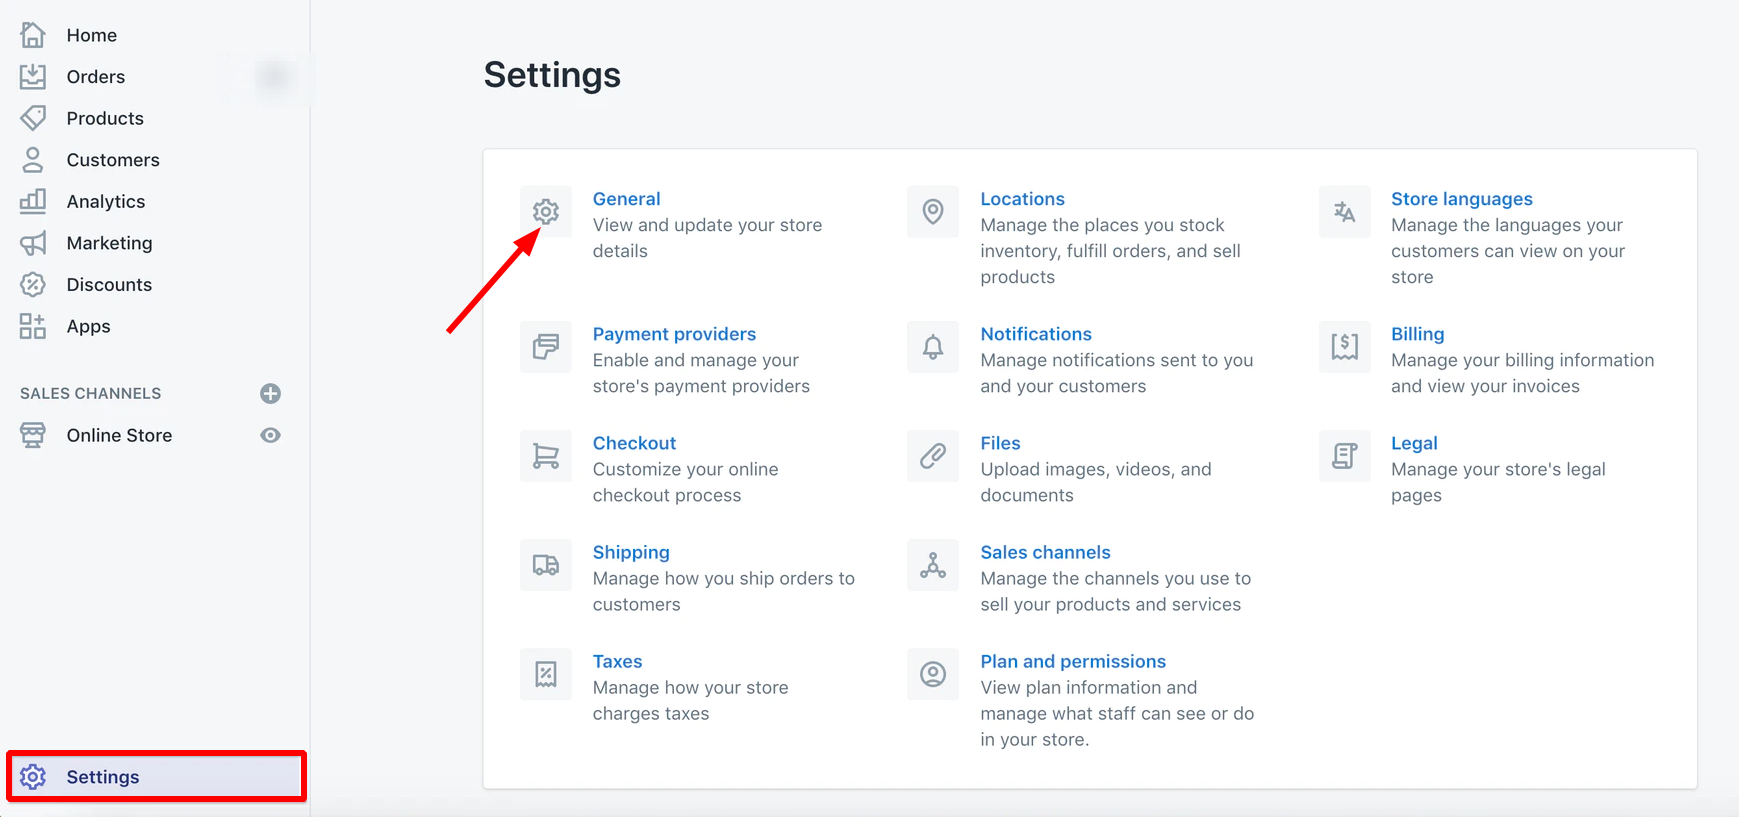
- Go to Settings > General and fill out all your store details, such as name, email, legal address, and store currency.

- Set up payments.
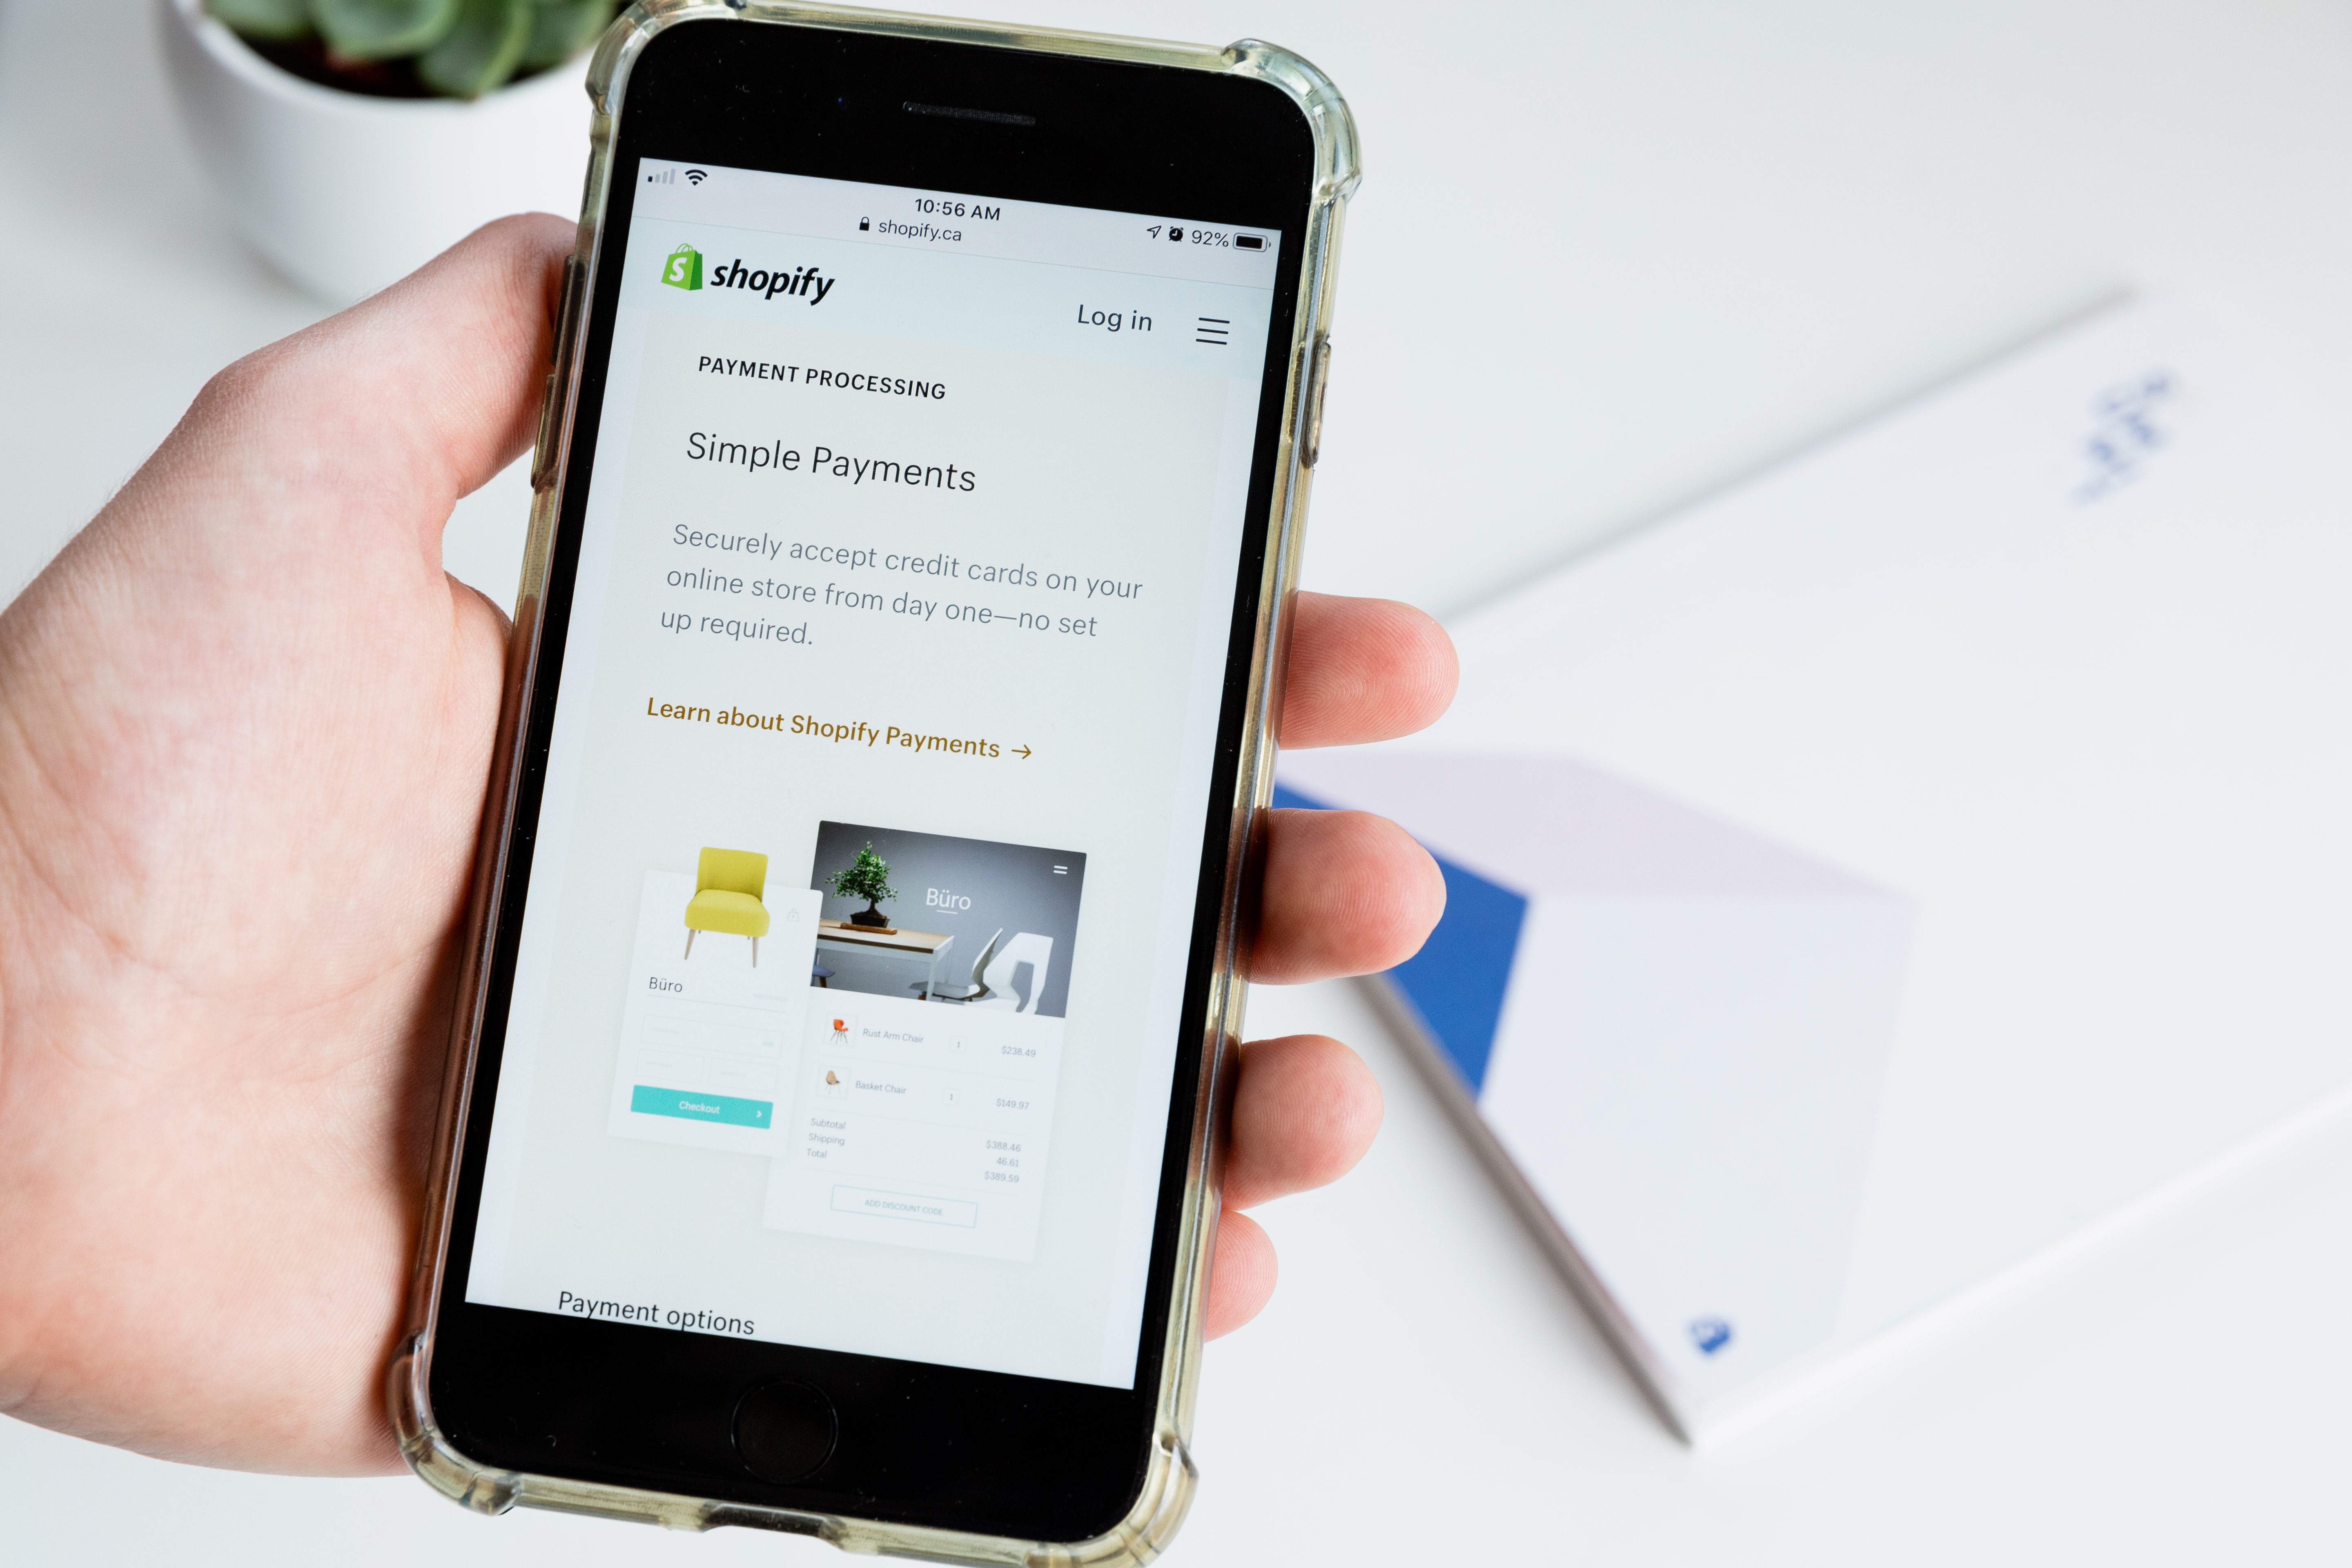
The easiest option is to connect Shopify Payments. It allows you to accept various payments, including credit cards, Google Pay, Facebook Pay, and more. In this case, you won’t have to go through lengthy third-party integrations with payment providers and have smaller transaction fees.
If you opt for another payment gateway, like PayPal, instead of Shopify payments, you’ll pay an extra transaction fee, from 2% on the basic plan to 0.5% on the highest plan. A lot of third-party payment gateways come with a subscription fee that you need to pay alongside the price of typical credit card fees.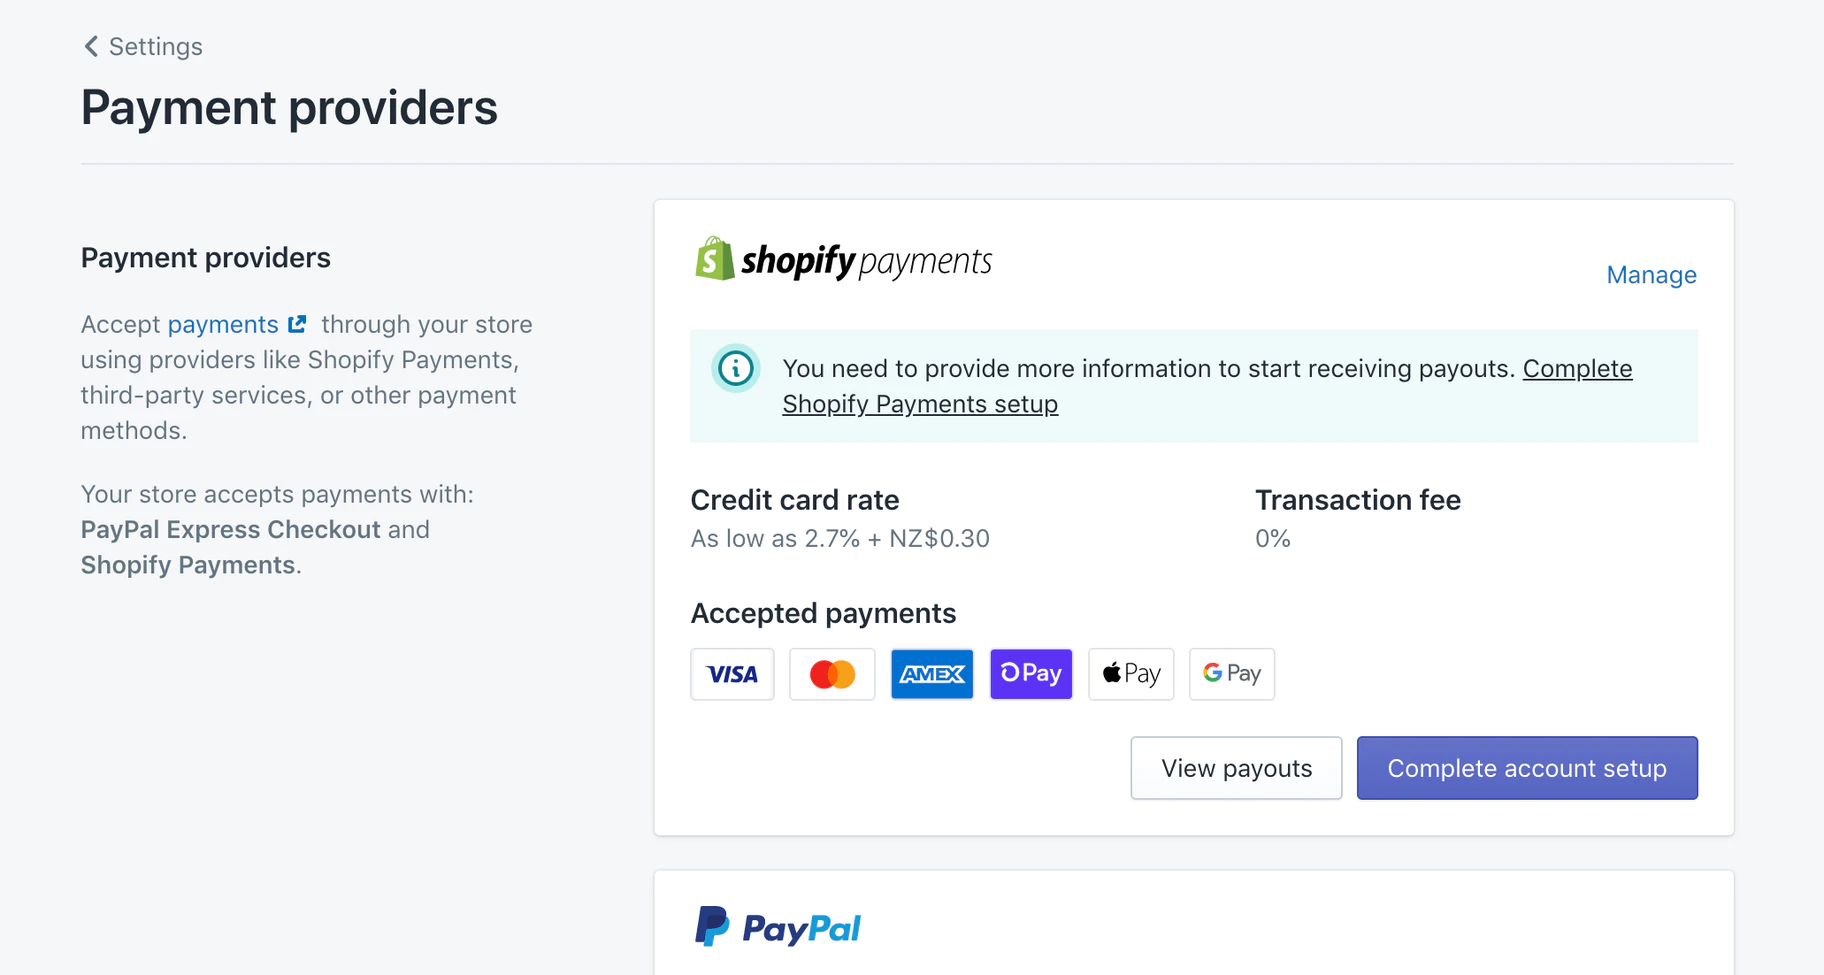
If you plan to accept cash, you’ll need to set up a Pay Period. It’s the time between the day your customer places their order in your store and when the funds are sent to your bank account. Later on, you can change, remove, or add additional payment options.
4. Set up the checkout.
You can modify your checkout settings, such as letting customers complete purchases without creating an account or letting them check out using either email or a phone number. This option can be useful if emails aren’t popular in your country for authentication or if you prefer sending order updates via SMS.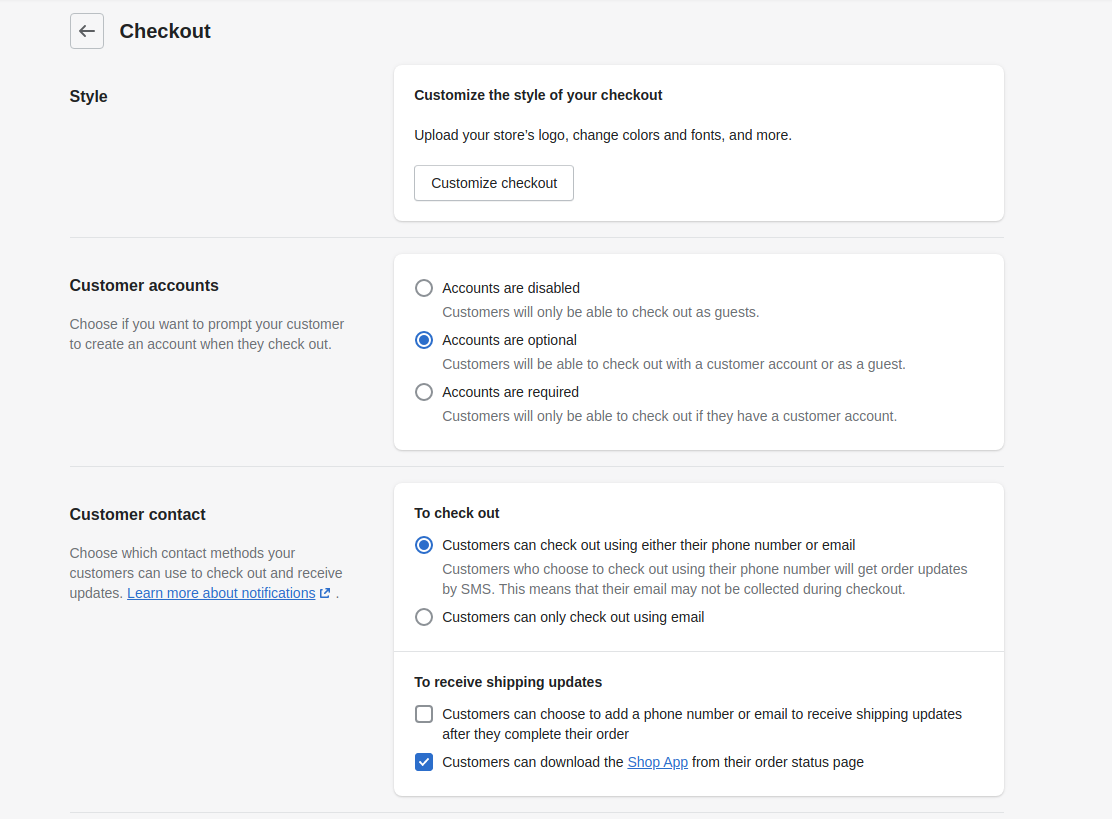
Additionally, consider setting up:
- Abandoned cart emails
With this setting, Shopify sends automatic emails 10 hours after your customers reach your checkout but fail to complete their purchase for any reason. - Customer contact
Consider leaving to only email, if you want to build an email list. - Email marketing
Let customers opt in during the checkout process to reach them with promotions or new products.
5. Generate your legal policies
Shopify lets you generate terms and conditions, standard privacy, and return policy samples from Settings > Legal. You can also add your custom policies. These templates aren’t legal advice, so adapt them when you create your online shop.
6. Add shipping rates.
Shopify offers integration with various carriers like USPS. You and your customers can benefit from discounted rates via Shopify shipping. Many merchants also offer free shipping as an incentive and apply it based on the region, order amount, or certain products. Shopify automatically adds the address you listed as you created the store as a location to fulfill orders. If you plan to ship from other locations, you need to add them separately.
7. Set up how you charge taxes.
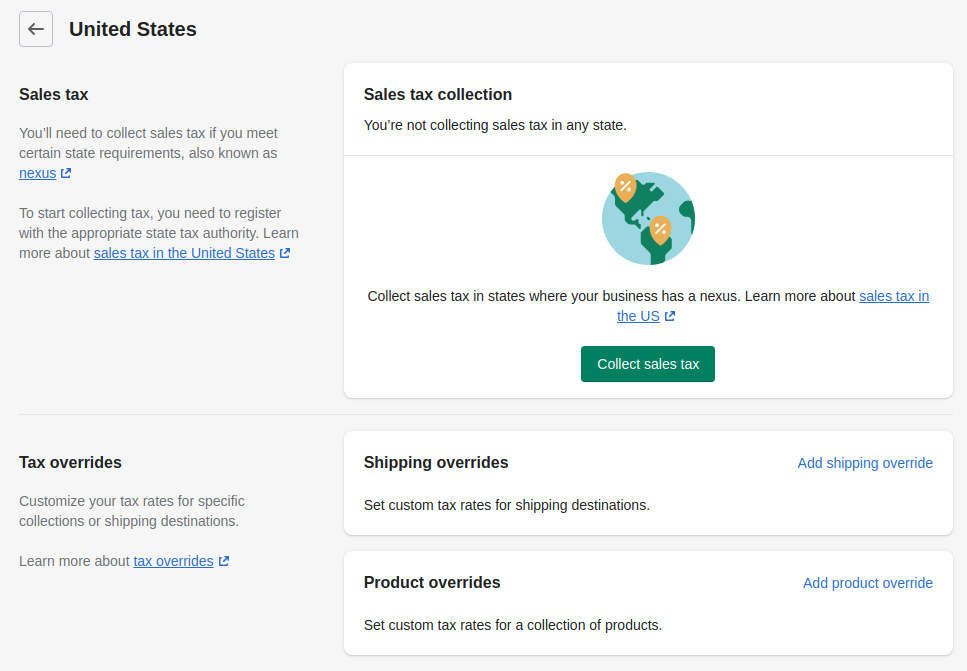 Shopify auto-calculates taxes based on the ongoing sales tax rates around the globe. To add tax rate, you’ll need to set up a Shipping profile for a country first in Shipping rates. You can override the defaults and edit specific rates. You can also enter your tax number here. Note that Shopify doesn’t pay or file your sales taxes for you. You’ll see how much tax you’ve collected under Analytics > Reports.
8. Shopify usually creates your store automatically. However, if the store hasn’t appeared, you can create it yourself.
Go to Shopify Settings > Sales Channels and add Online Store as your sales channel. You can also add other sales channels like Facebook.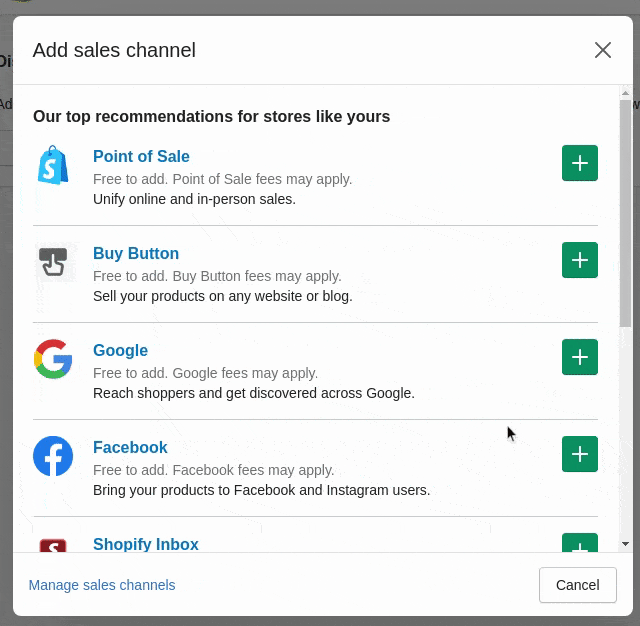
Add products and content to your Shopify store
- Adding products
 You can create your first product listing under Products > Add product. When you’re creating a product for your Shopify store, you’ll need to provide a title, a description, and a photo.
The title should clearly describe what the product is. We’ll be adding the name of the plant. To create a product description:
- Highlight incentives, like free shipping or your product being eco-friendly.
- Anticipate issues. Do your customers need to know that your product is gluten-free or where it was made?
- Make them scannable. Use short chapters, bullet points, and bold text.
- Help your customers see themselves using your product. Add a sizing chart or list the materials you use.
For a product like a house plant, potential customers would be interested to know how high-maintenance the plant is, its basic needs, and its size so that they can see if it fits in their space properly. So, we added this information for the store’s visitors.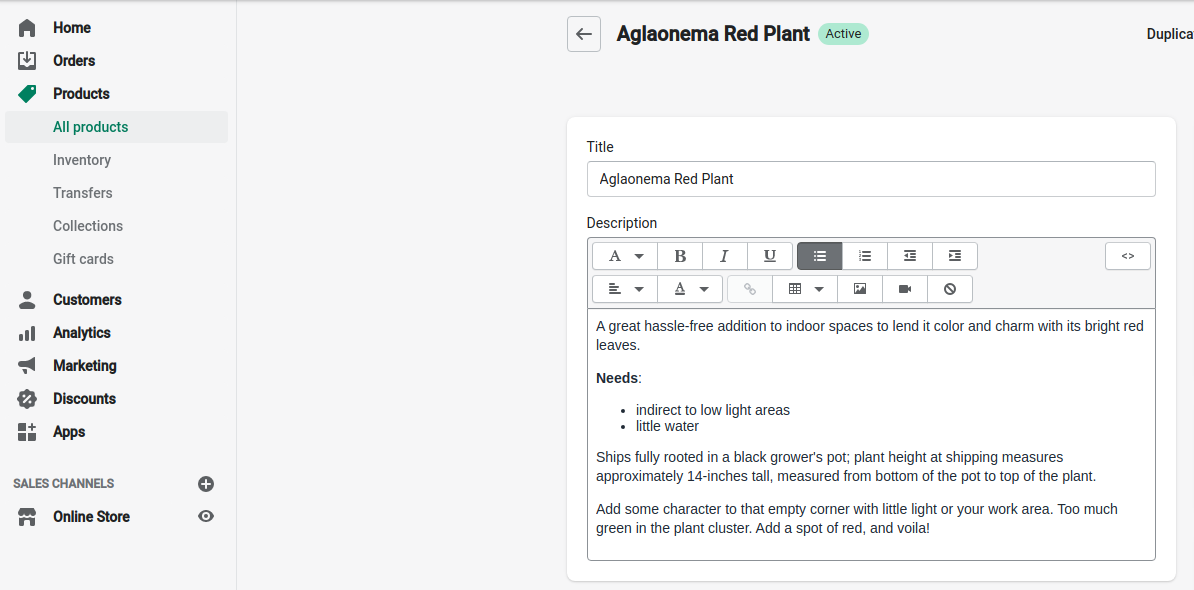
When adding photos, try to use high-resolution images that stick to the same aspect ratio. This way, your images will look consistent, and the overall impression will be more professional.
You can make basic edits once you upload the image. You can also edit the Alt Text for accessibility to describe your photos to people who cannot see them.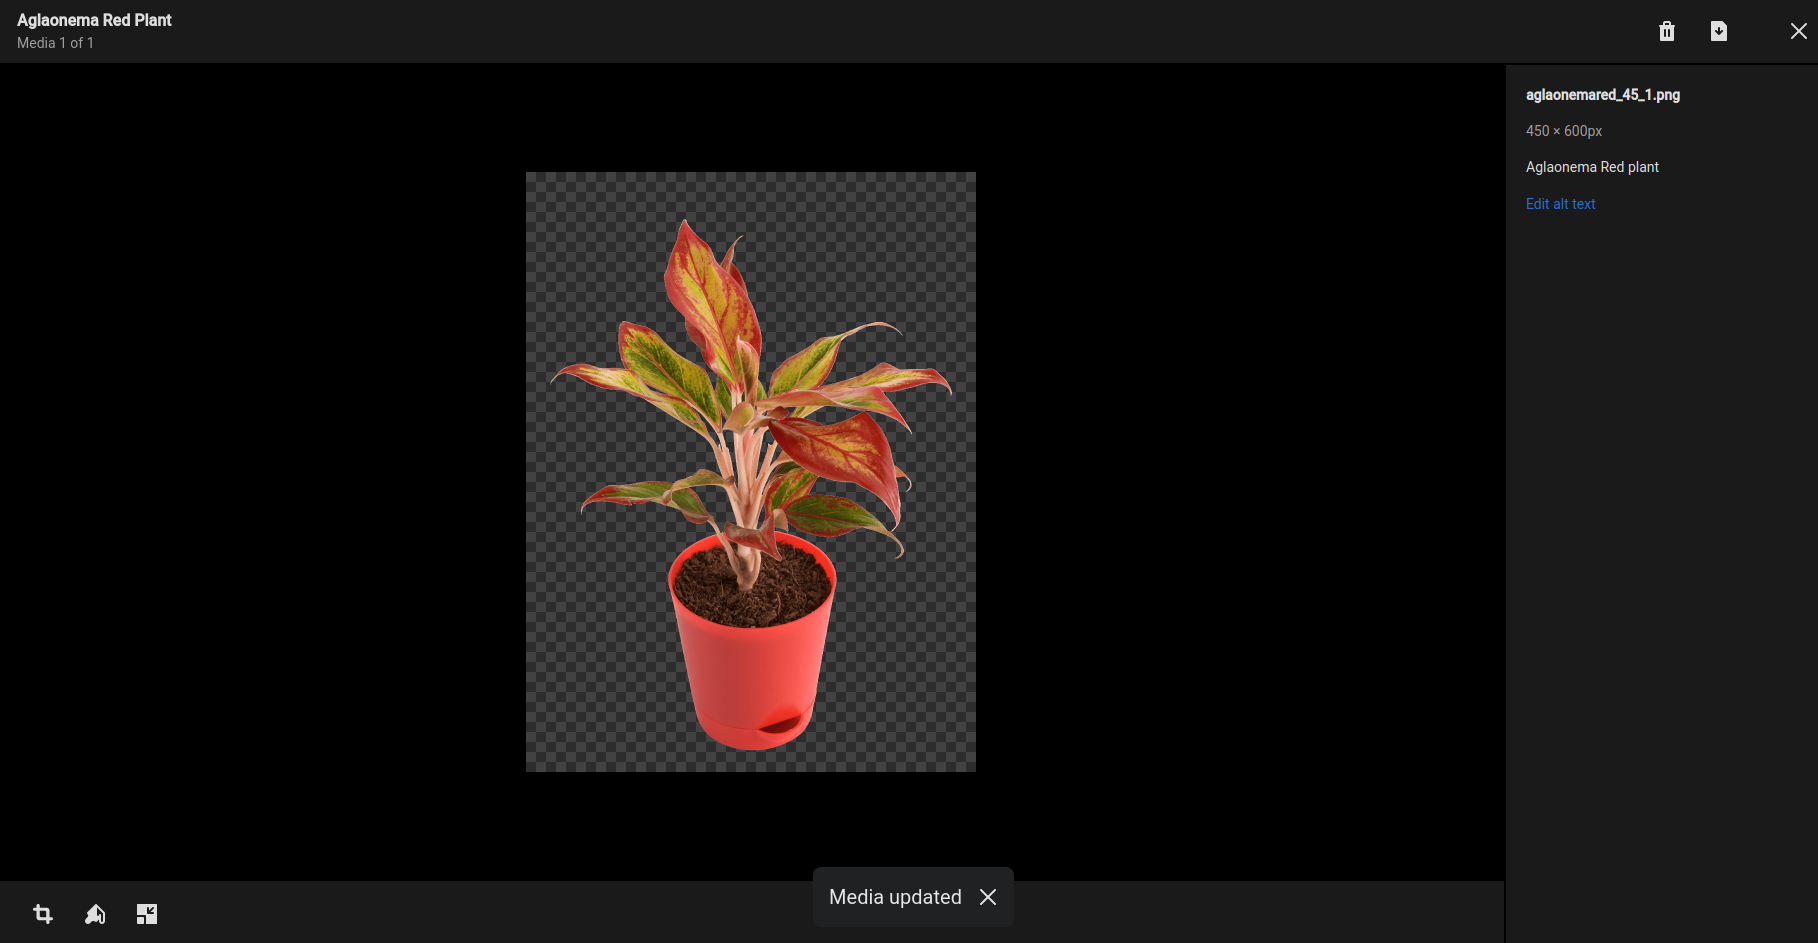
- Creating collections
Collections are product categories on the Shopify website. If you’re selling house plants, your collections could be (from top to bottom): Cacti, Succulents, Pet-friendly plants, Tropical Indoor Plants, etc.
Go to Products > Collections > Add New Collection, enter your collection name, and select your collection conditions.
With collections, you can make navigation on your store easier for your customers and curate products that you want to offer on sale. You can also create a featured collection to be displayed on the homepage.
- Set up product pricing and inventory.
There are three fields in Shopify’s pricing section: price, compare at price, and cost per item. The second field will let you inform customers that the product is on sale. 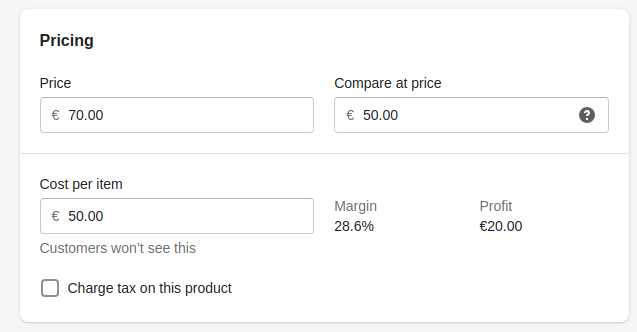
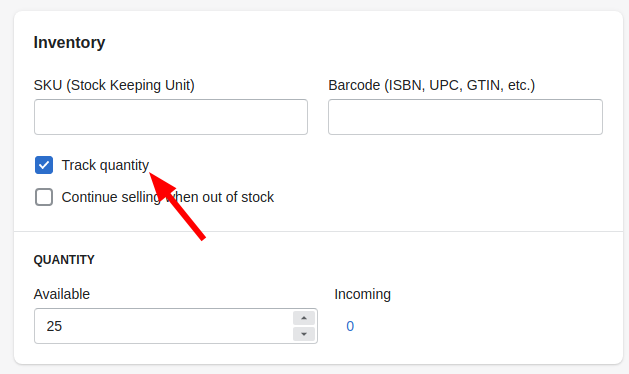
If you’re selling physical products, let Shopify track your inventory. To do this, click the ‘Track quantity’ checkbox and set the number of items available to buy. This way, if you sell 25 units of a product, Shopify will show that the product is out of stock and stop people from placing orders until you refill the stock.
If you’re doing dropshipping, there’s no need for an inventory. However, if we sell our plants from our farm, then we’ll need to track quantity. Shopify uses the following parameters to track inventory:
- SKU — a stock-keeping unit that tracks specific products and variants. Create a consistent system with whatever makes sense to you so that you can identify items at a glance. For example, CS-AV tells me it’s the aloe vera from the category of cacti and succulents).
- Bar codes are used if you eventually want to add scannable bar codes. If you plan to make and sell your own products, you can leave the field empty.
- Quantity — how much of a specific product you have on hand. If you connect multiple locations with inventory, Shopify will display them here.

We won’t be adding variants, but many stores do. If you sell products with multiple options, like colors or sizes, you need to add price, tracked inventory, and shipping to each specific variant.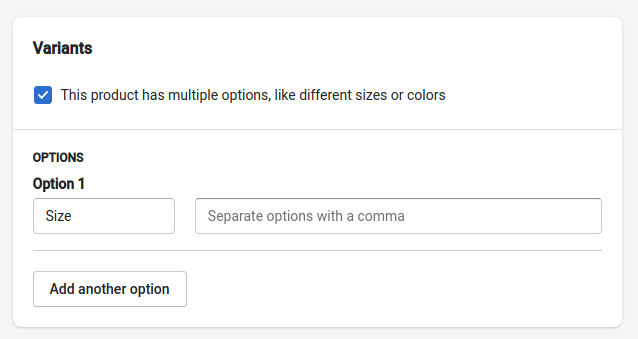
- Adjust SEO
You can also customize the search engine listing preview; that is how this page will appear on search results.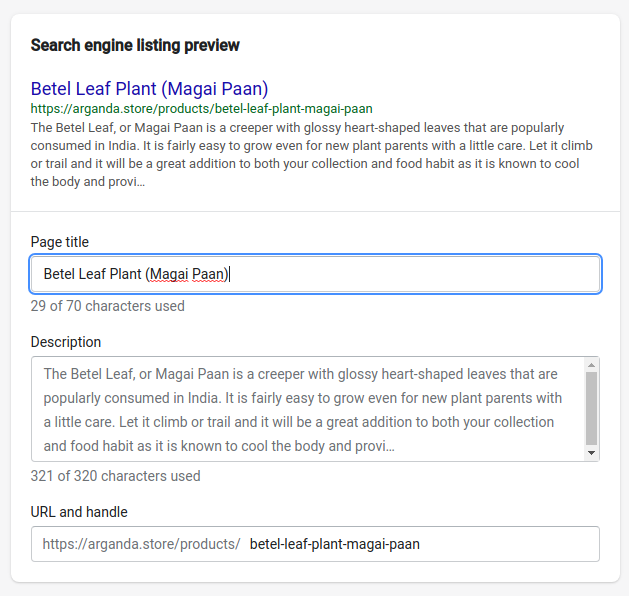
If you have a list of keywords your customers use to look for similar products, work them into this part. It will help increase your chances of showing in the search results. To find keywords, you can use any keyword research tool like Ubersuggest or Ahrefs.
Once done, hit Save and preview the product page. Repeat this for each product you want to add to your store. However, to launch your store, you don’t need to add all your products; you can add them as you go.
Design your Shopify store’s layout
- Choose your theme
Shopify assigns a default theme to your store to be applied automatically. If you’re just starting with your store, you can leave it at that till you see what’s working with your customers. Customizing a new theme will also take more time.
Start with free Shopify themes, like Debut or Simple. With them, you can experiment with layout, edit, rearrange or temporarily hide sections until you’re satisfied with the result.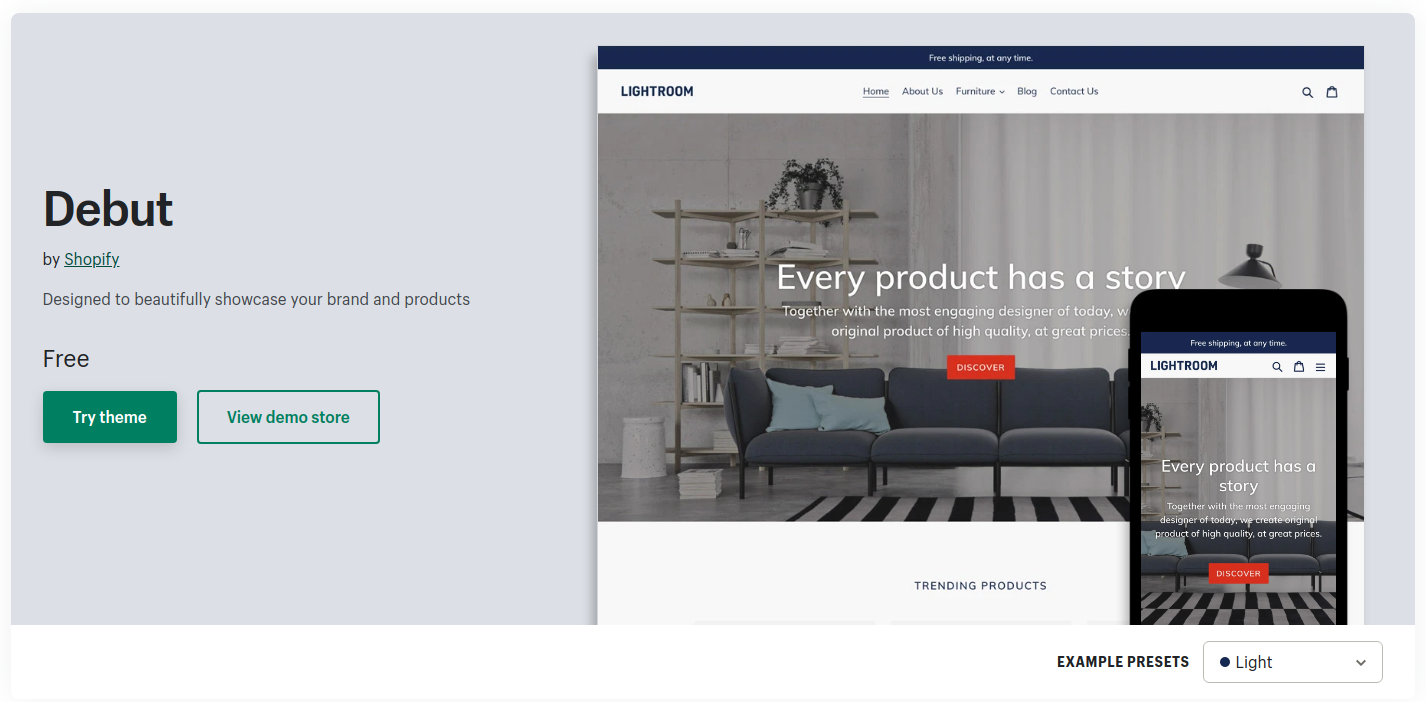
Don’t invest in premium themes until you generate income with your store. You also can make use of hiring a Shopify expert to help you with advanced theme customization; however, in the early stages of setting up your store, it might just be overkill. Within every theme, you can edit fonts, color schemes, logos, items that appear on the page, and more.
- Edit the menu
In the header section, you can set up three main forms of navigation:
- Main navigation — top menu with priority paths you want your customers to take. Any items in the main menu can have multiple dropdown levels to present customers with additional options.
- Footer — to save links to pages that might be distracting for first-time visitors, but you’ll still want customers to be able to find them, for example, return policy.
- The search bar that can be enabled if you have many pages on your website and hundreds of products in your catalog.
- Create pages
You can create most pages under Online Store > Pages. You don’t have to create all the possible options, just whatever makes sense in your specific case. Here are some helpful pages to include in your store:
- About us. This page is where you can share how and why you started your business, describe your business model, and show the humans behind your store.
- Contact page. Showcase the ways to reach you if your customers have questions.
- FAQ page. Point your customers to the page where they can find answers to frequently asked questions. An updated FAQ page will help alleviate some of the more common inquiries.
- Policy pages. Include here return and refund policies, as your customers will likely expect them. They can help protect you in case of disputes as well.
- Upload the main banner.
You can simply add a free image from the Shopify collection or create a banner in an editing tool like Canva. Just make sure you set proper banner dimensions (1200x360px). As you upload the banner, you can edit the homepage and hide elements.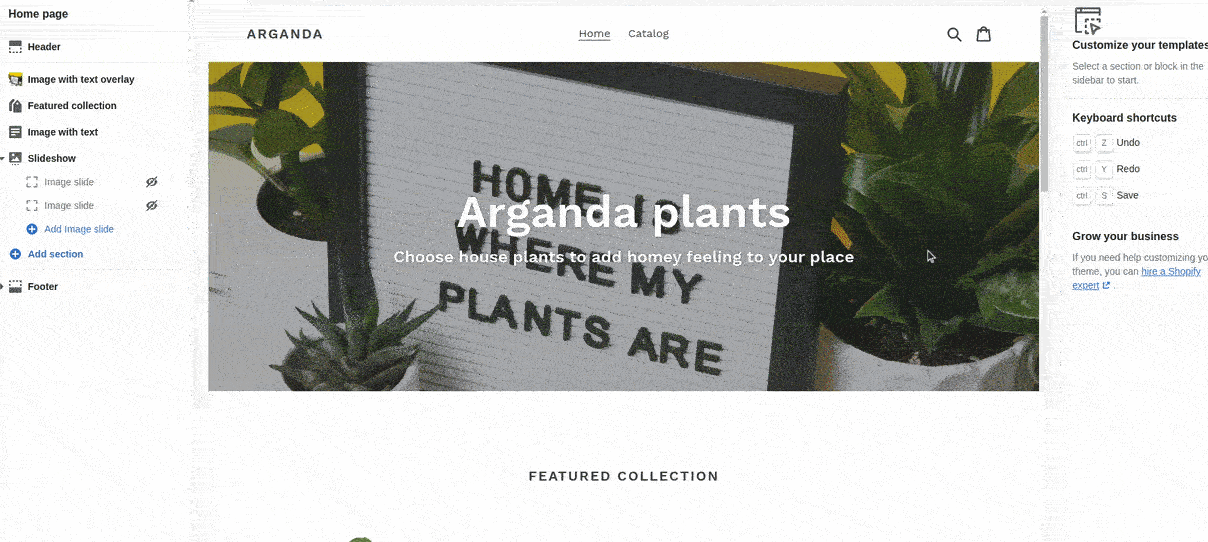

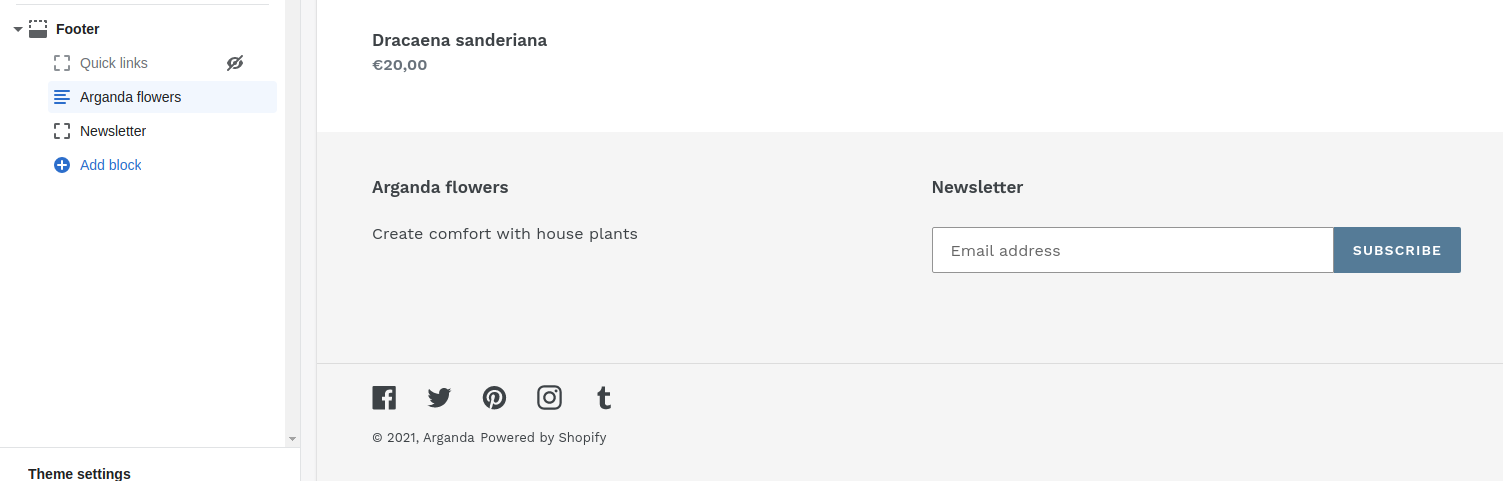
- Edit the footer section, and include the categories you added to the main menu, newsletter sign-up form, and social media icons.

Once you’re ready, disable the password protection under Online Store > Preferences. The customers will be able to start buying your products.
These are the basic steps that will get you your first Shopify eCommerce store. Even with all the free tools, you’ll get a store that customers can use.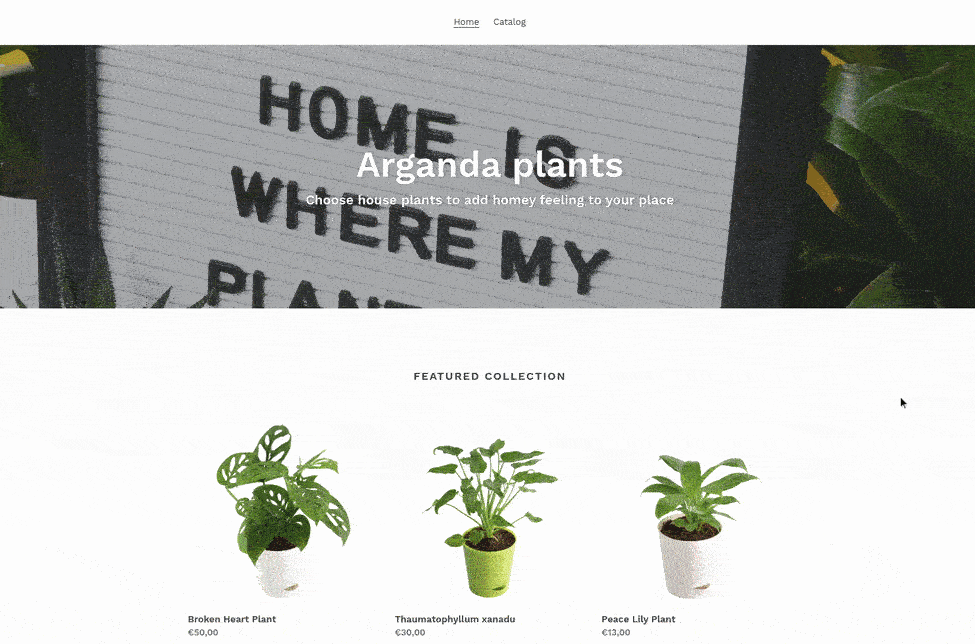
Summary
Shopify is an eCommerce platform that works for different business models. It fits businesses of different scales — from handmade products to large wholesale stores. Despite multiple options that can seem overwhelming, setting up a store on Shopify is fairly easy once you know what you sell and have your product information. Here are the basic steps:
- Select a business name.
- Create a Shopify account.
- Add products.
- Set up payments.
- Customize your checkout.
- Add legal policies
- Add shipping rates.
- Set up taxes.
- Create an online store.
- Write product descriptions.
- Add product images.
- Create an About Us page.
- Decide product pricing and inventory.
- Create collections.
- Choose a Shopify theme.
- Create the main menu.
- Upload the main banner.
- List featured products.
- Set up your footer.
- Launch your Shopify Store